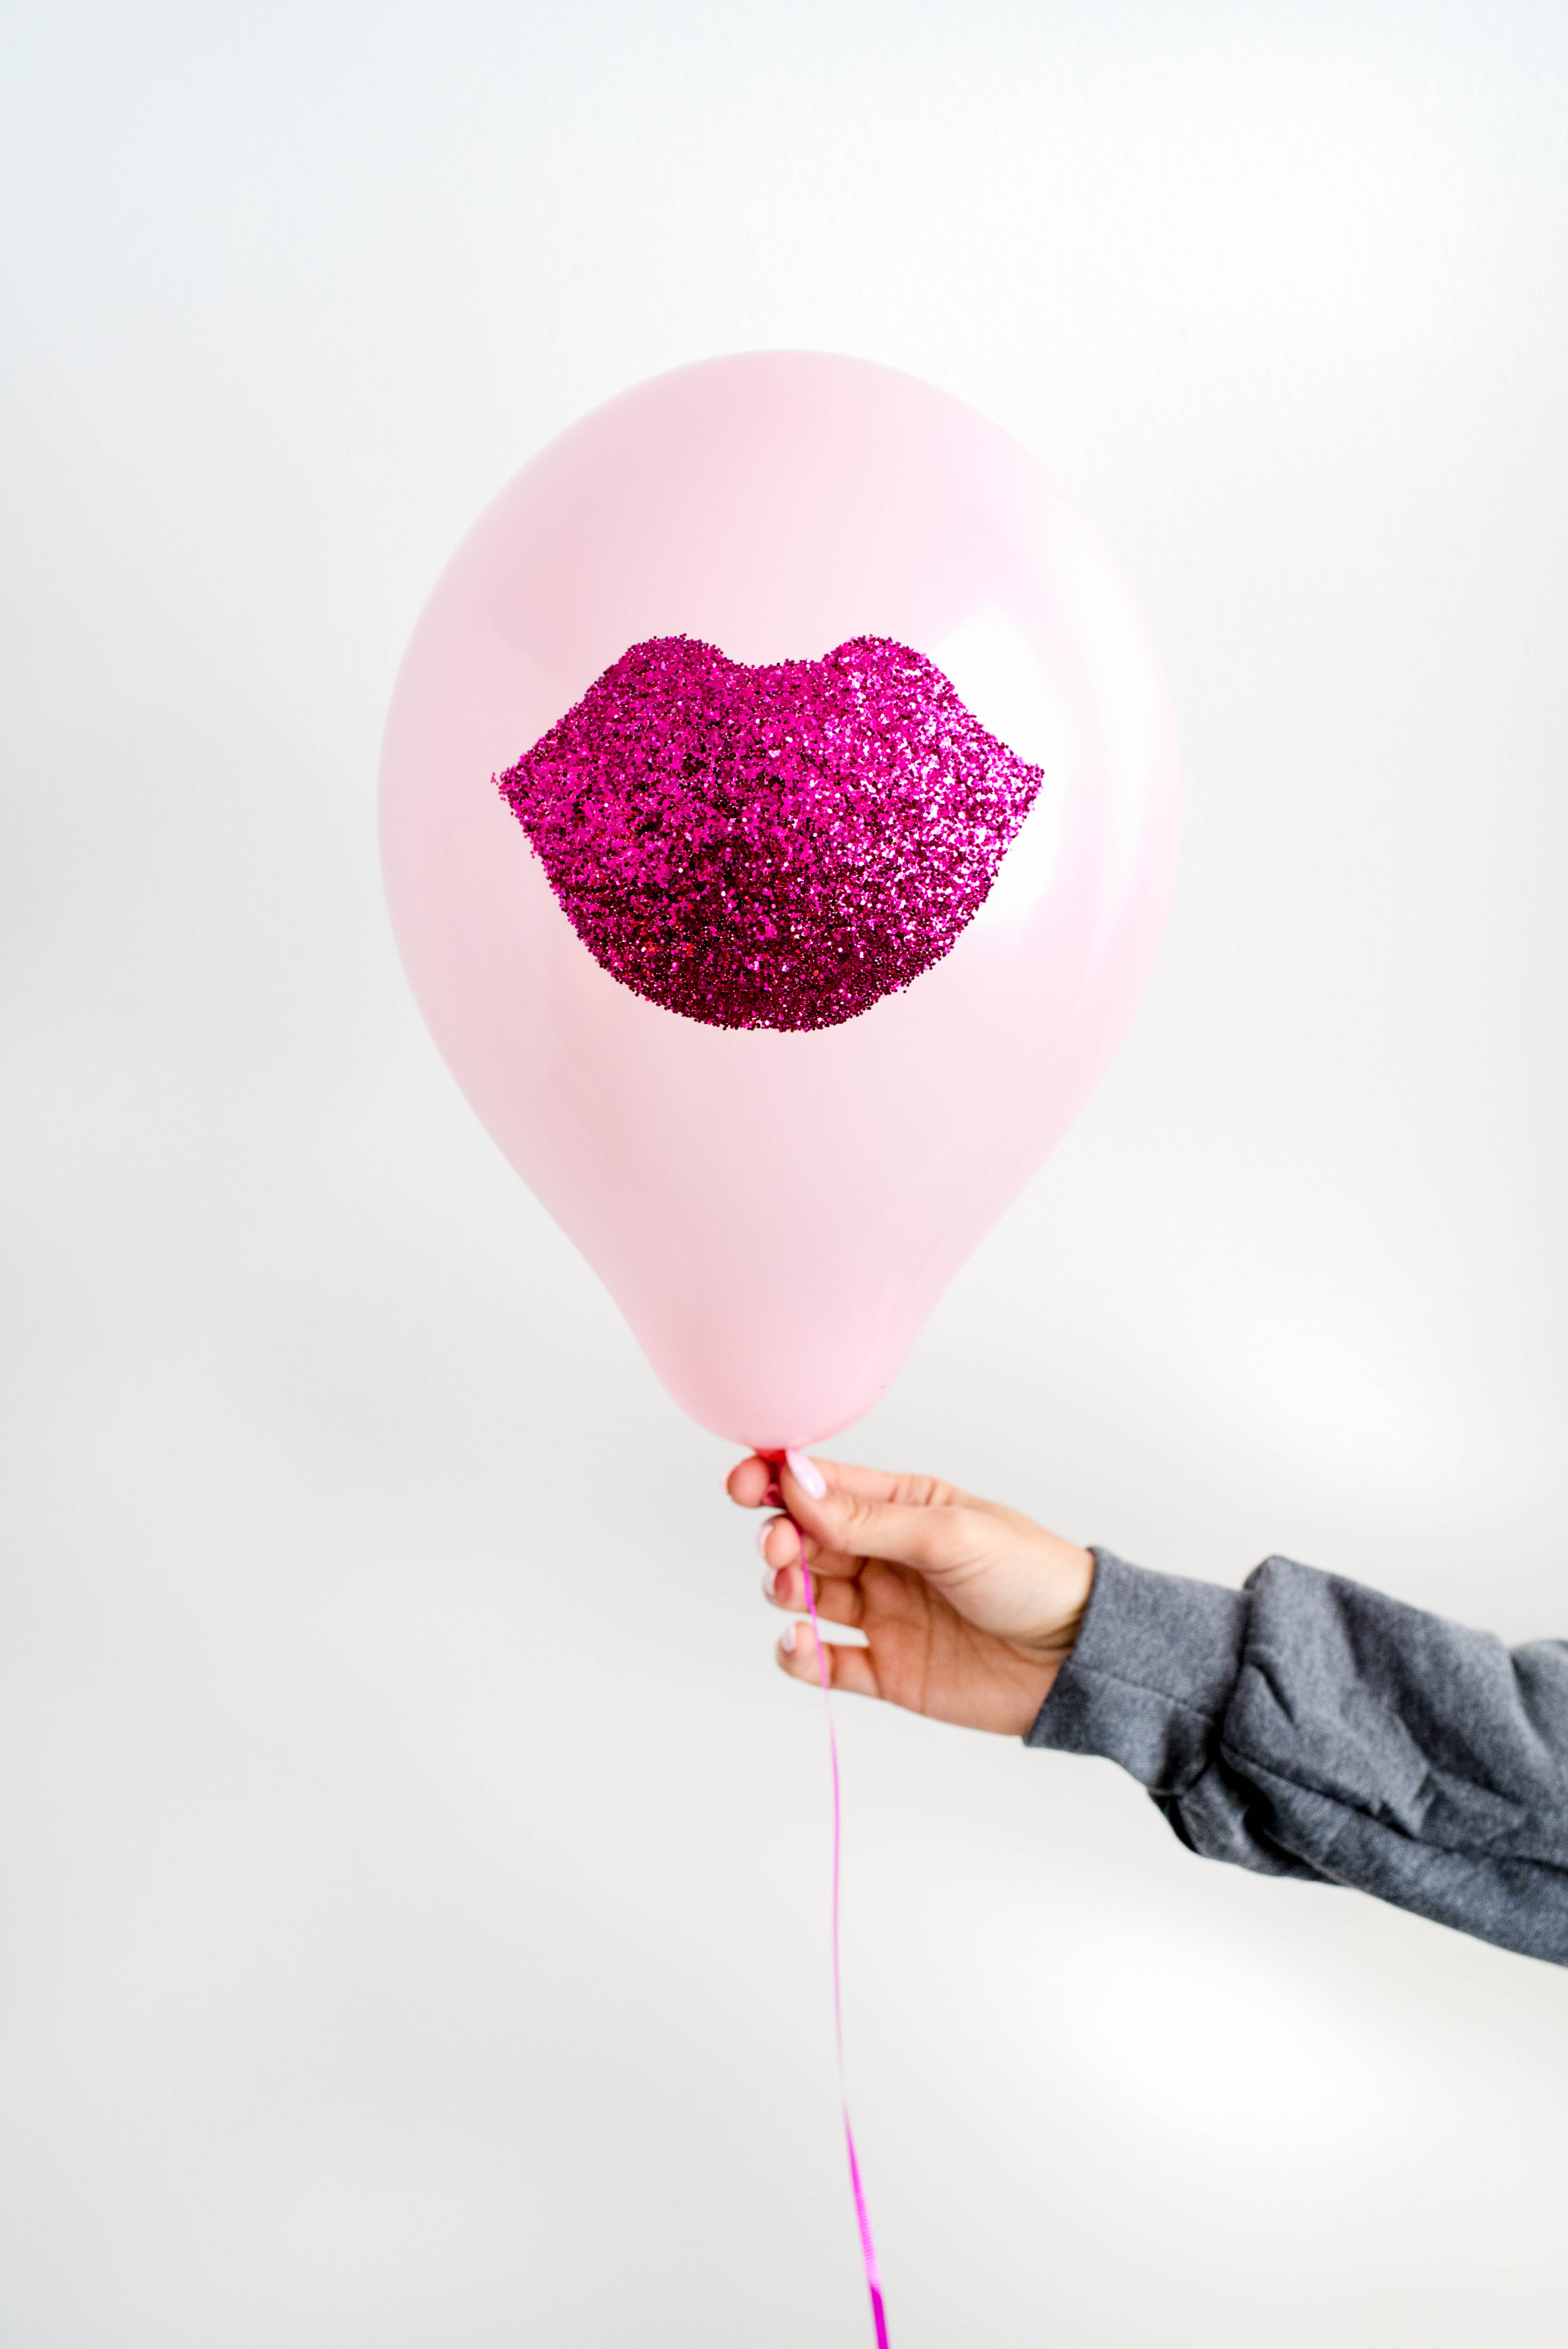
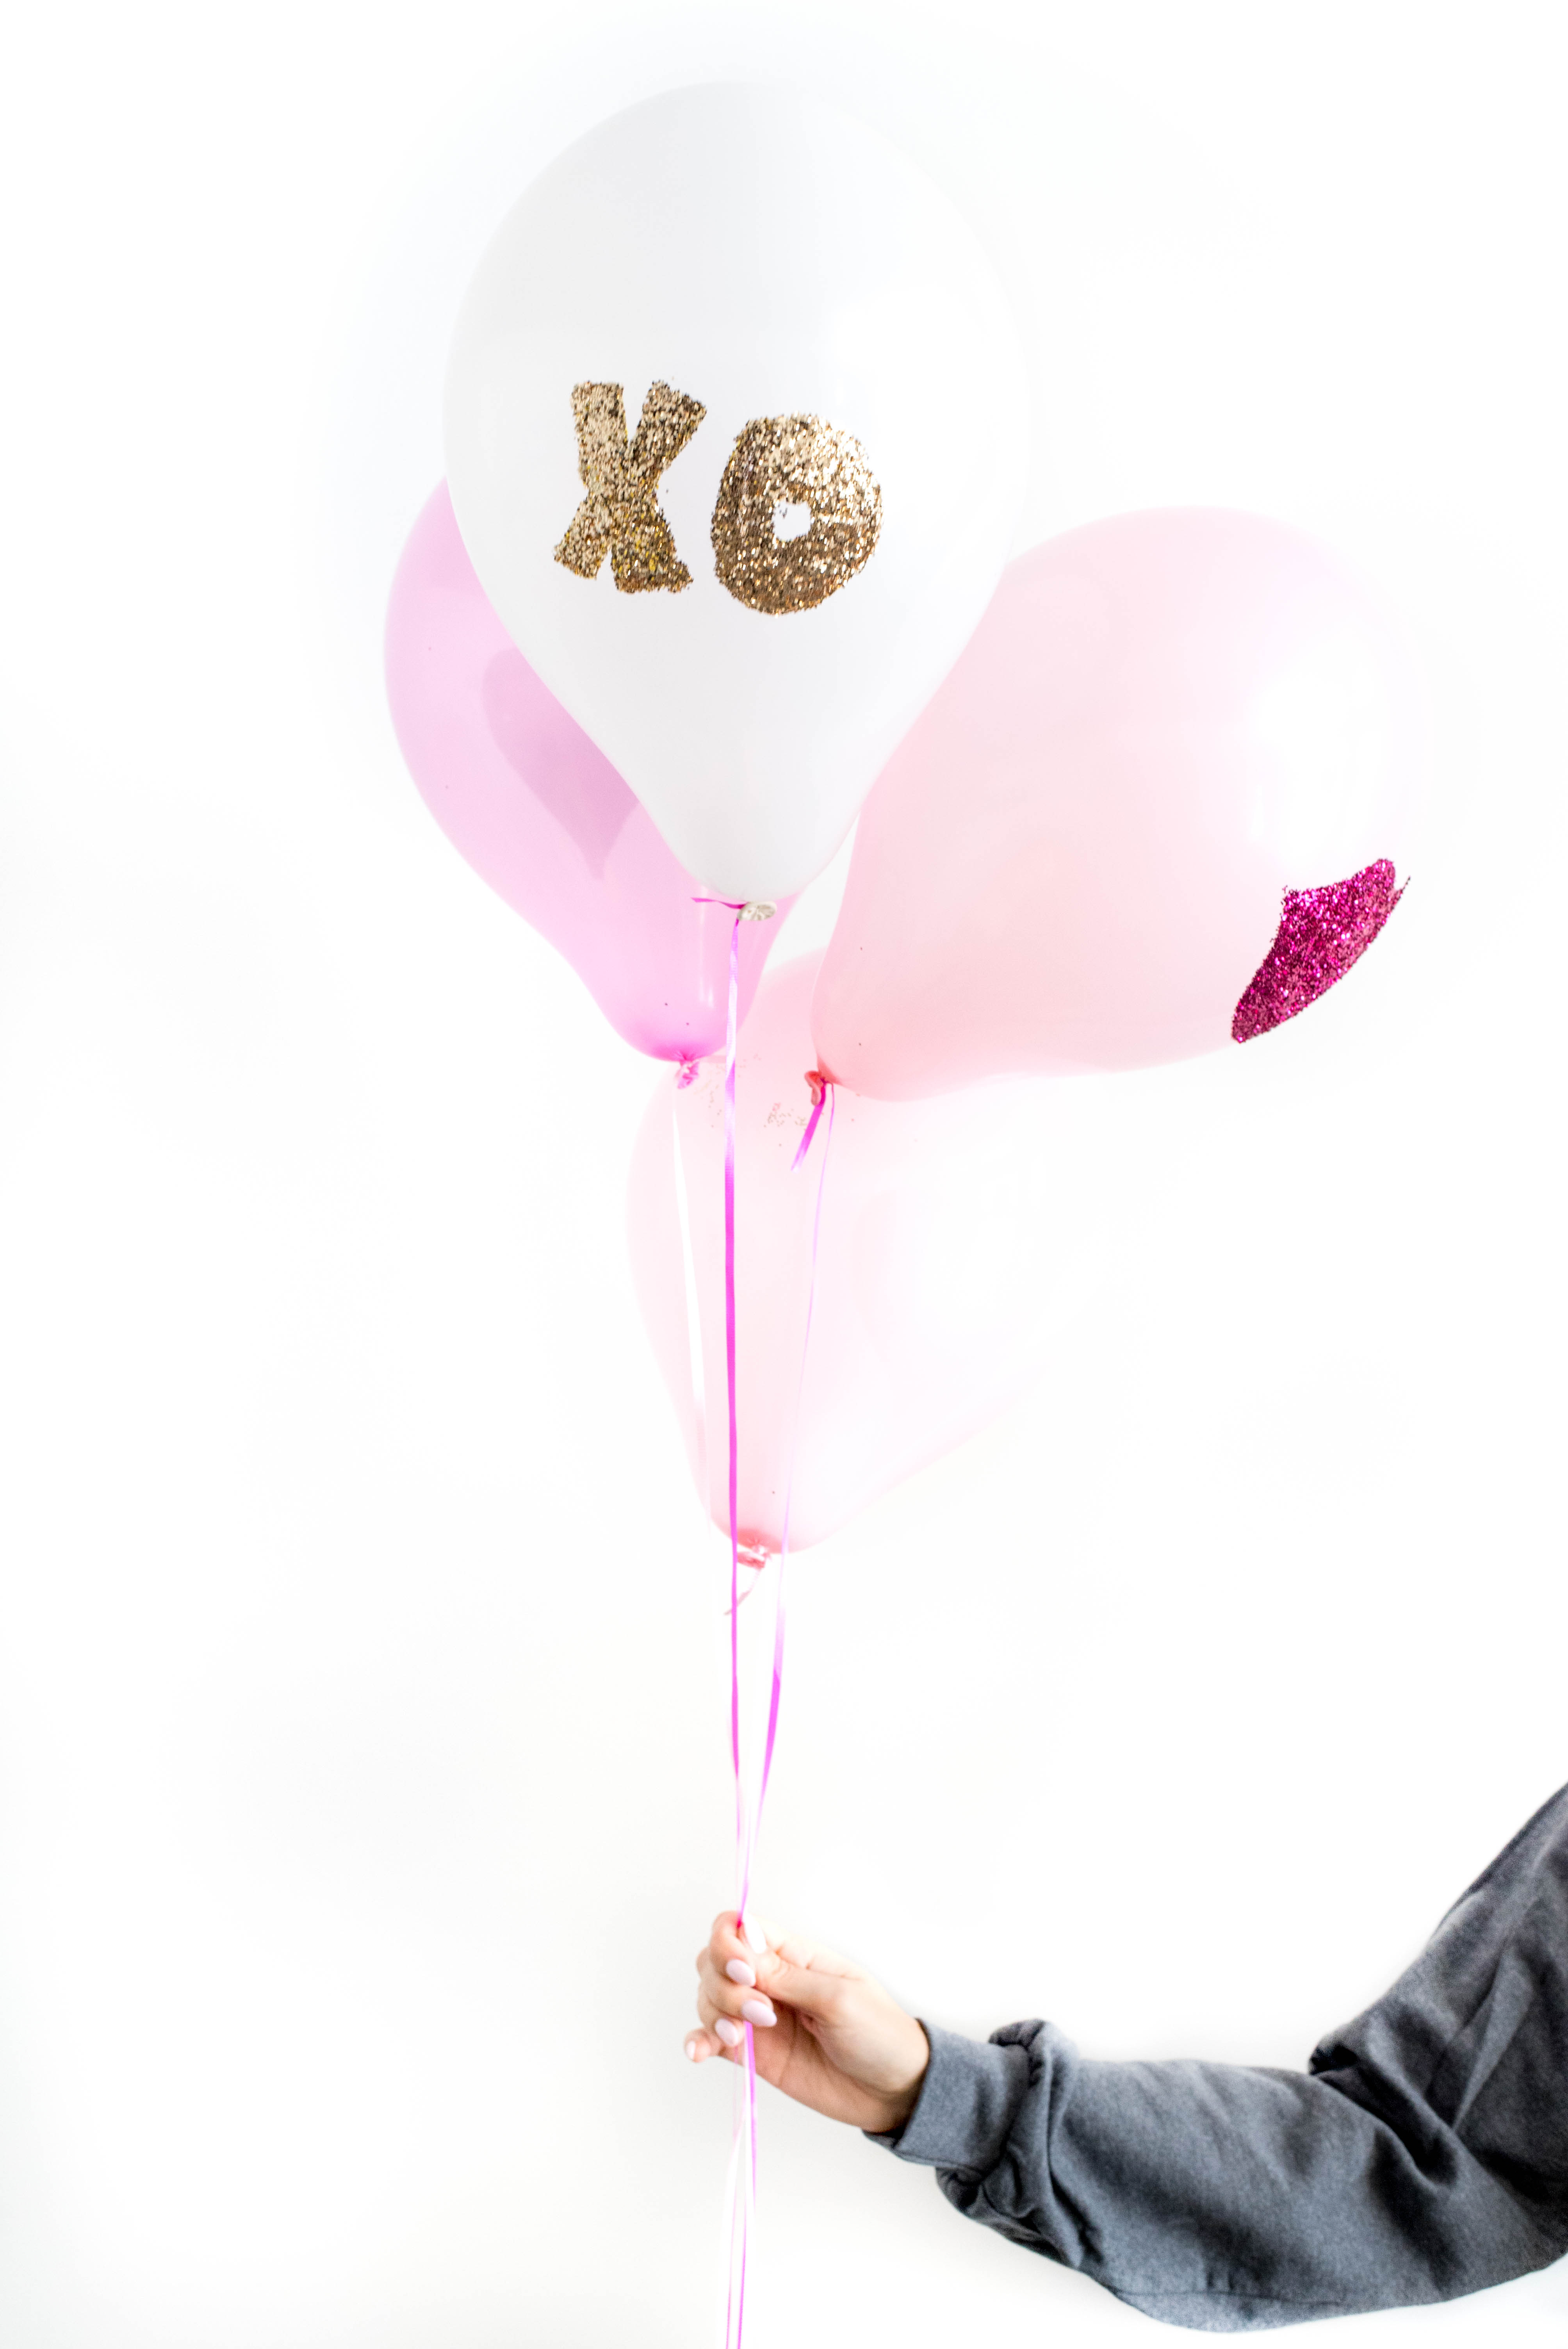
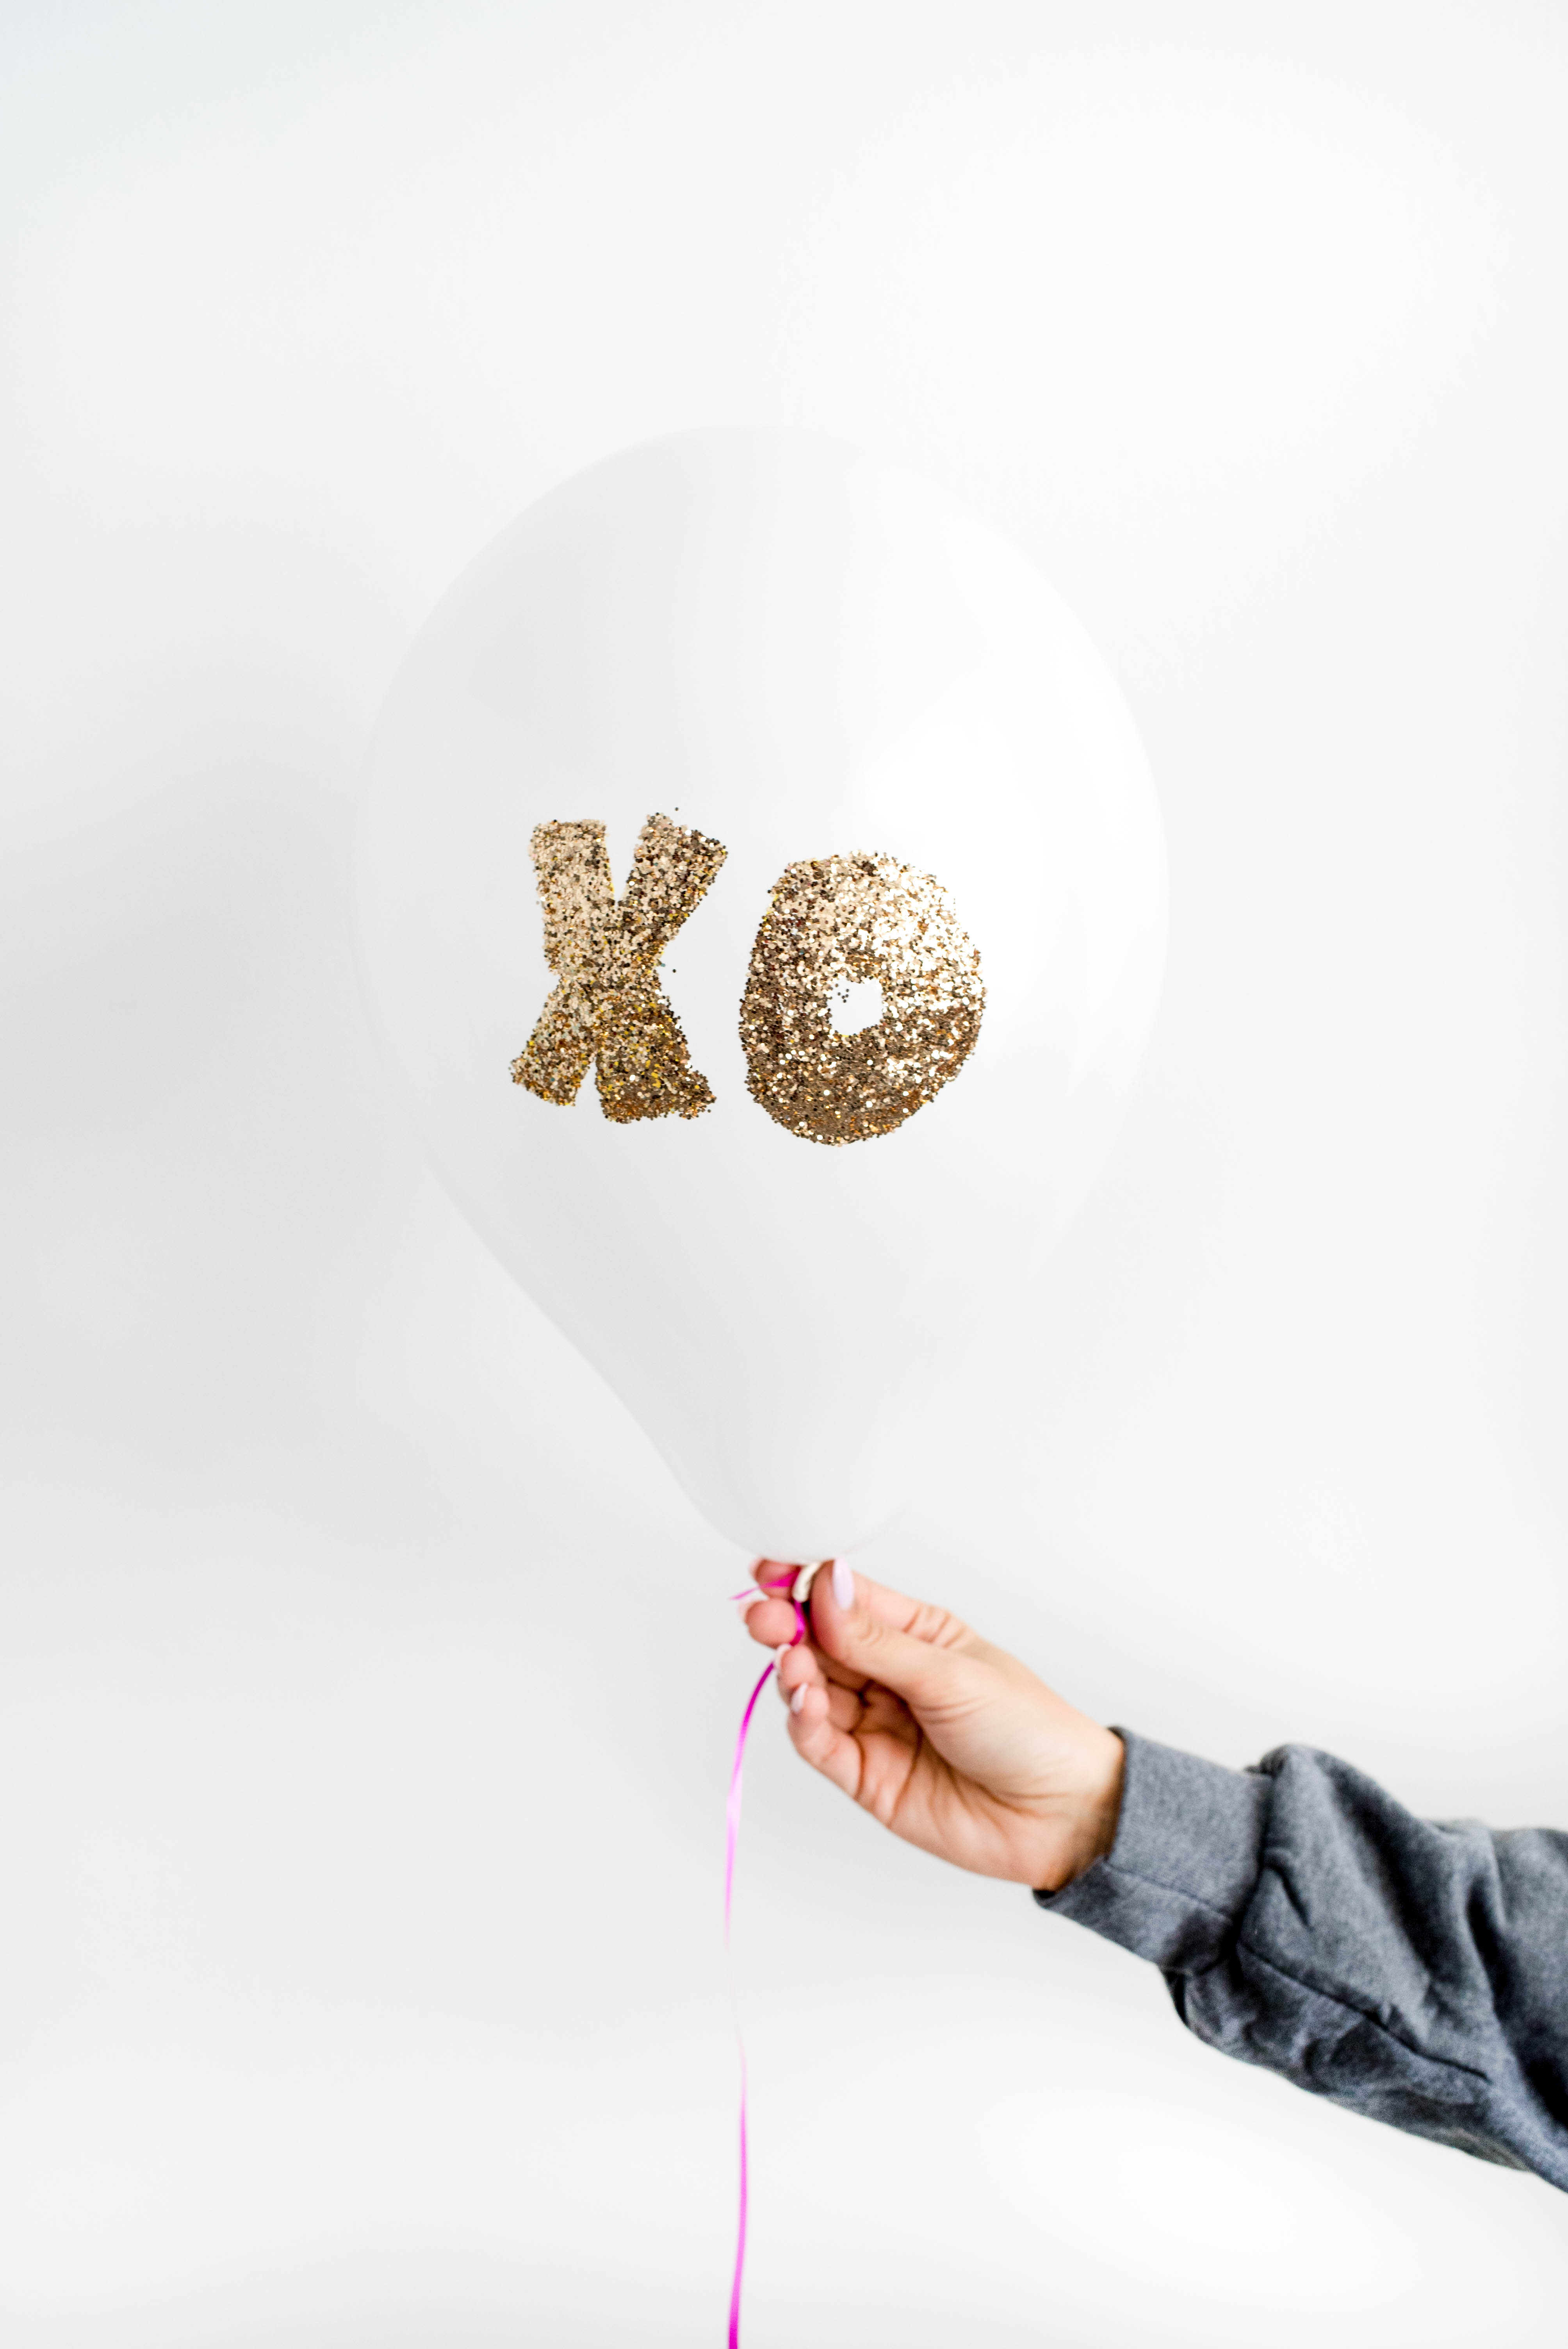
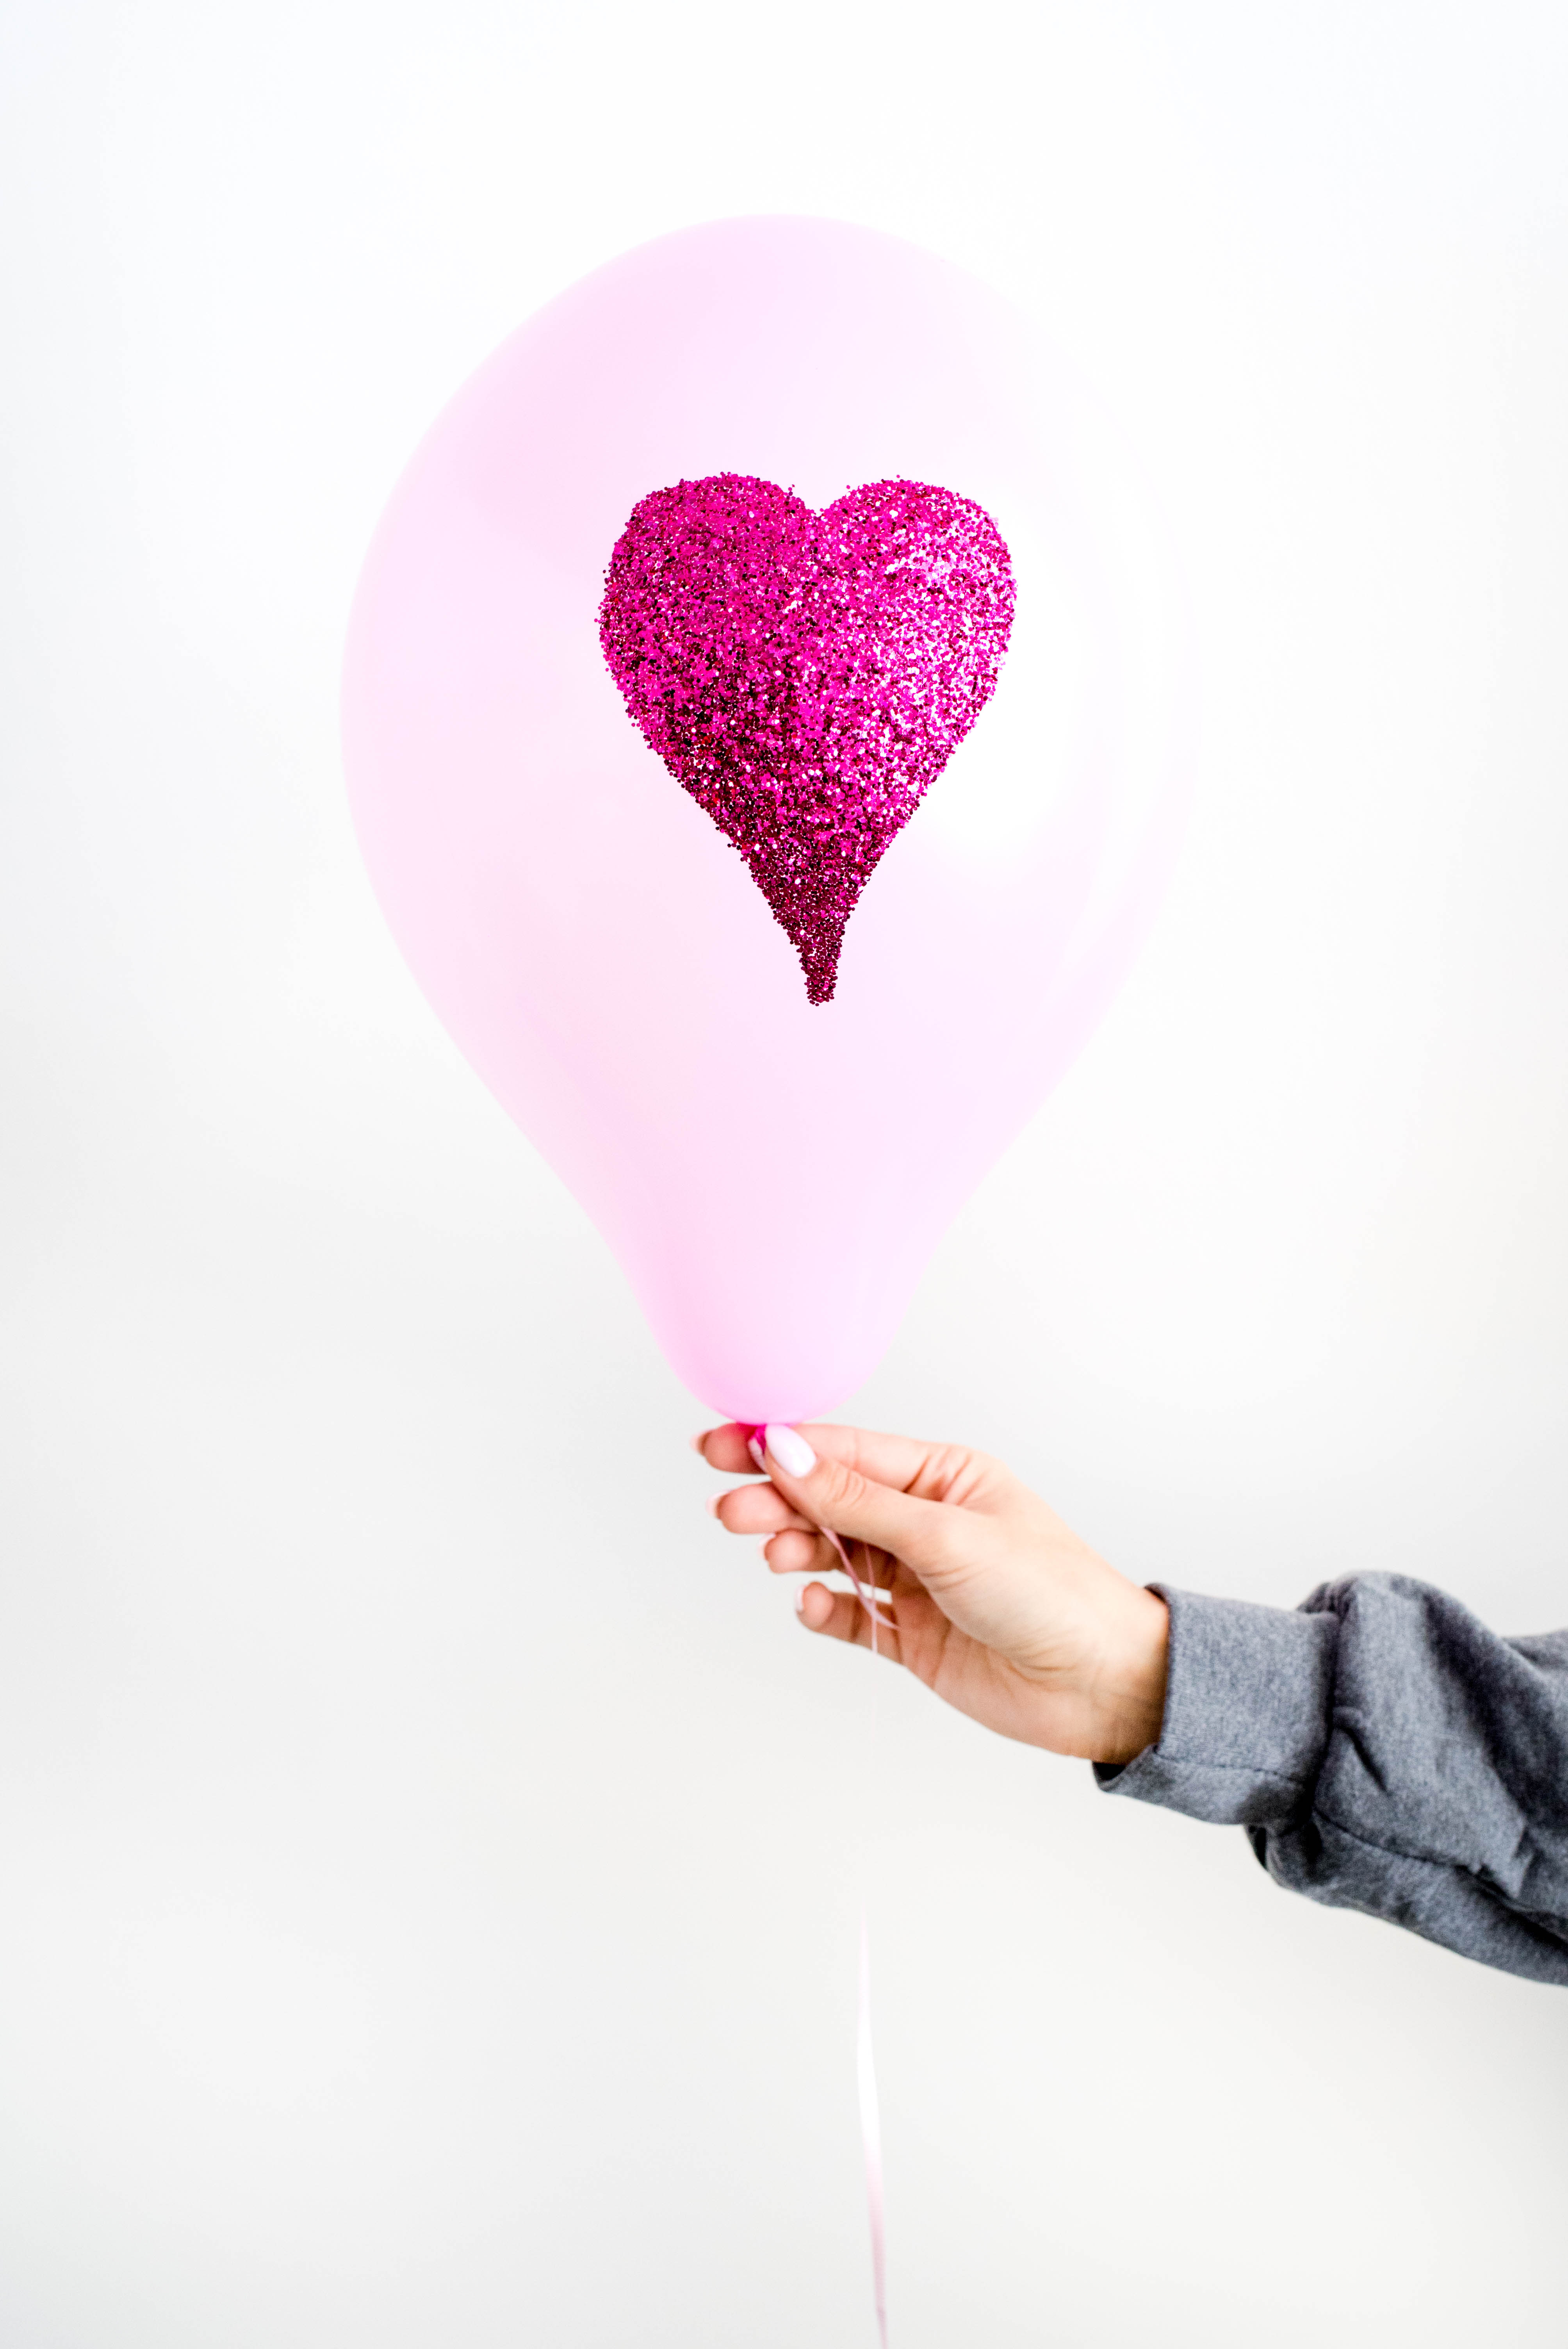
These DIY glitter balloons add a fun and festive touch to any party that you might be throwing and they are super simple to make too!
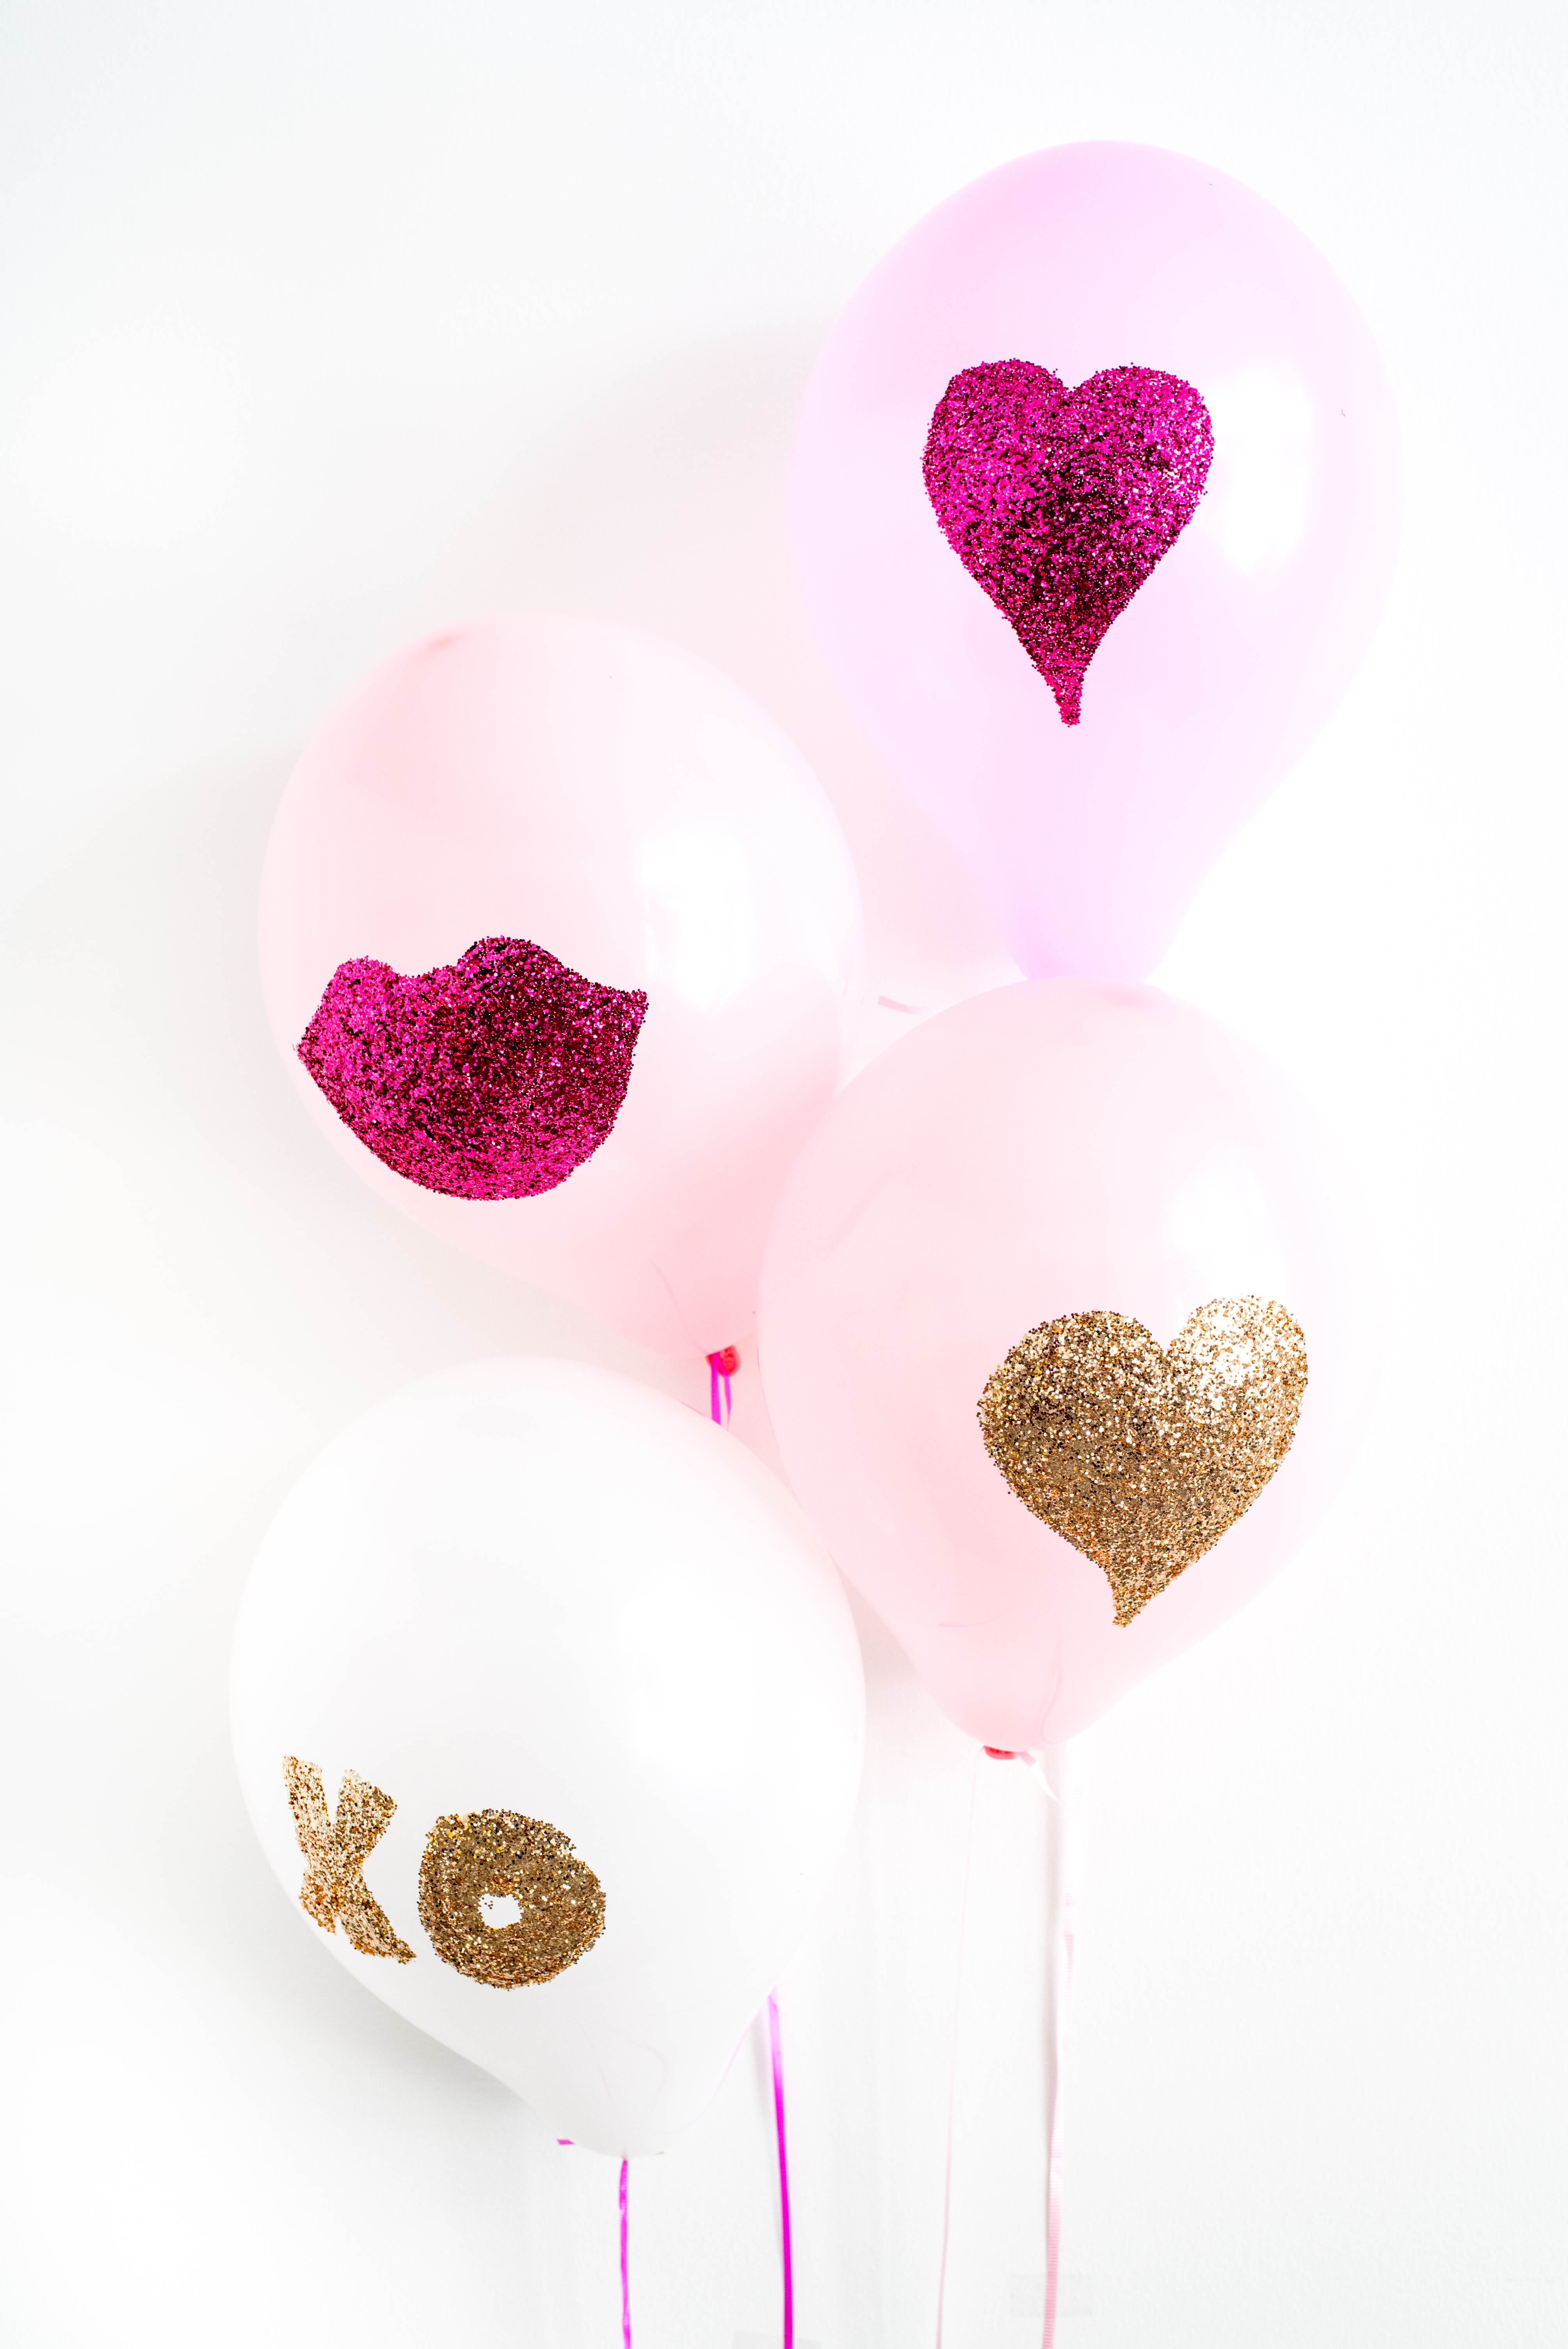 I’m typing this post on a Monday night and I’m not going to lie guys…it’s rough. Mondays are rough. The start of a fresh new week, but also the hideous reminder that our weekends are over. Back to reality. Ugh. I’m coming off of a really fun and fabulous weekend and this new week just seems to be rougher than normal. But, these DIY glitter balloons really are helping to brighten my mood. Pink, white, fuchsia, gold, and GLITTER. How can you go wrong?! You can’t. Not with these pretty little things.
They add the perfect Valentine’s Day touch to any gathering you might be throwing this year, and they are super simple to make too!
I love how fun and girly they look for Valentine’s Day, but this DIY could easily be used for any holiday or celebration by using different designs. I love the idea of spelling out the name of someone for their birthday dinner or even shamrocks for St. Patricks day. So much glittery fun!
Glitter + balloons = a good time. Don’t you think?
 Here’s what you’ll need to make your own:
- Balloons (Already blown up)
- Sharpie (Pick a color that matches your glitter)
- Tacky Glue
- Sponge Brush or Small Paintbrush
- Glitter
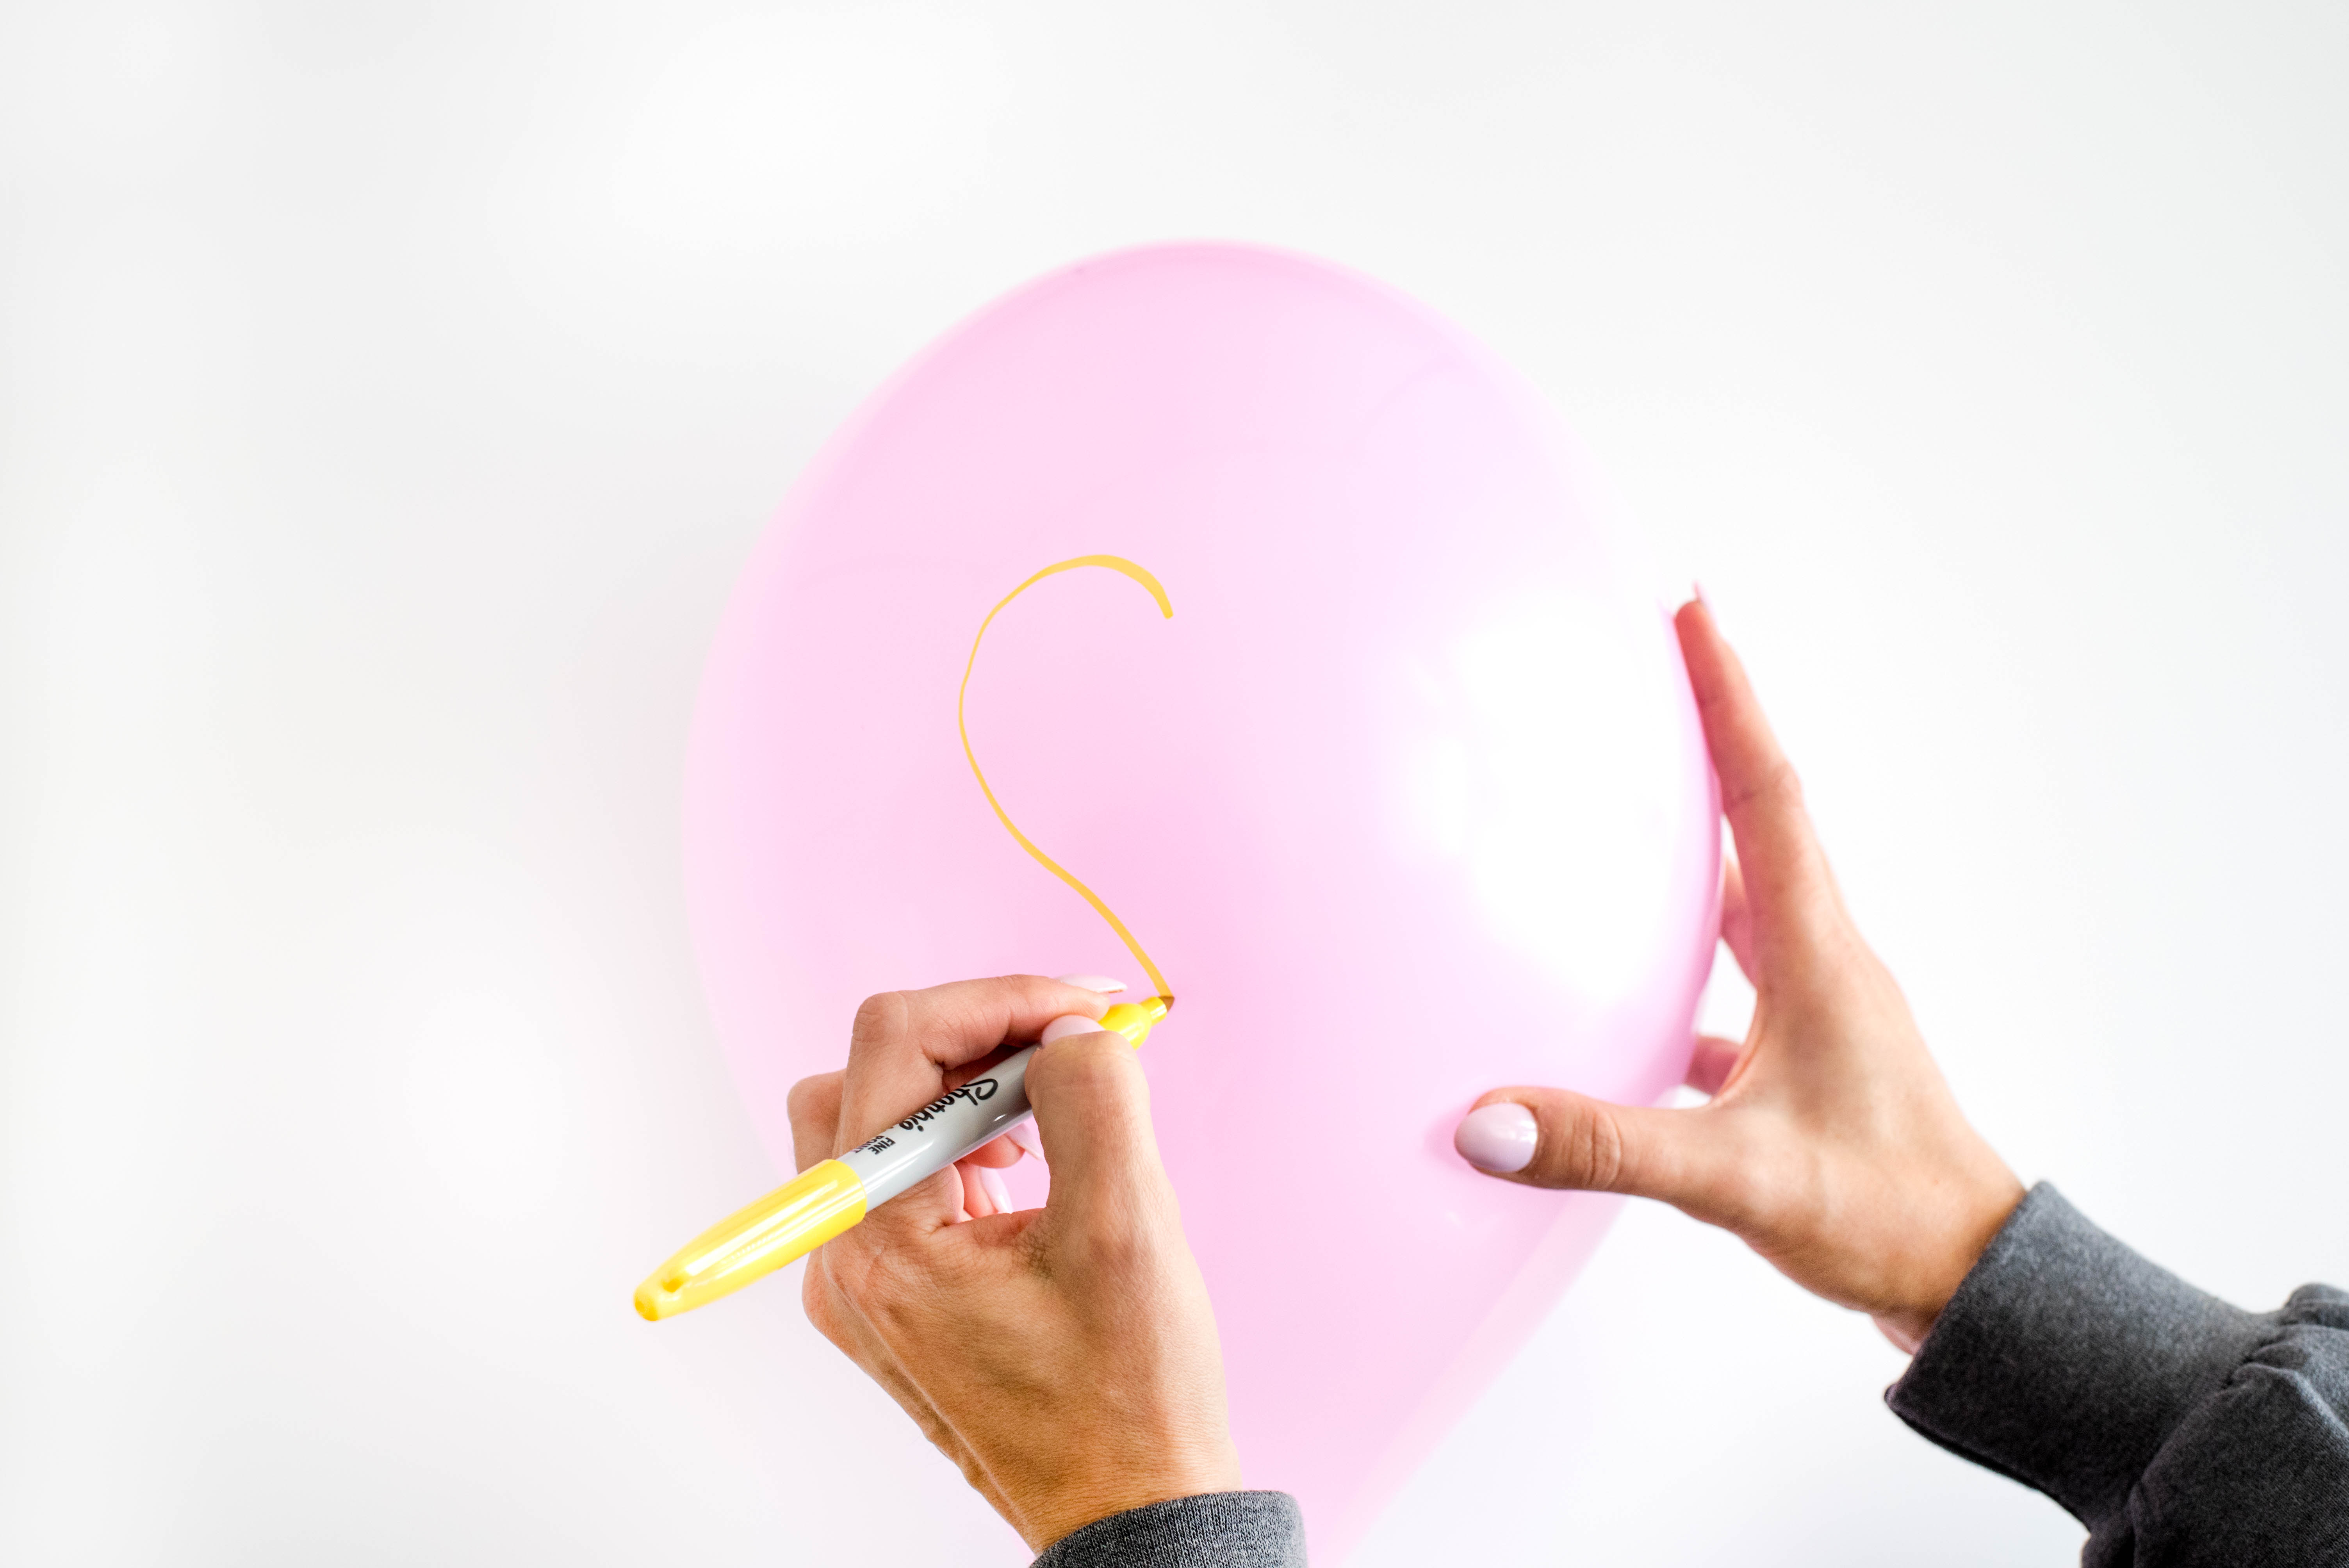
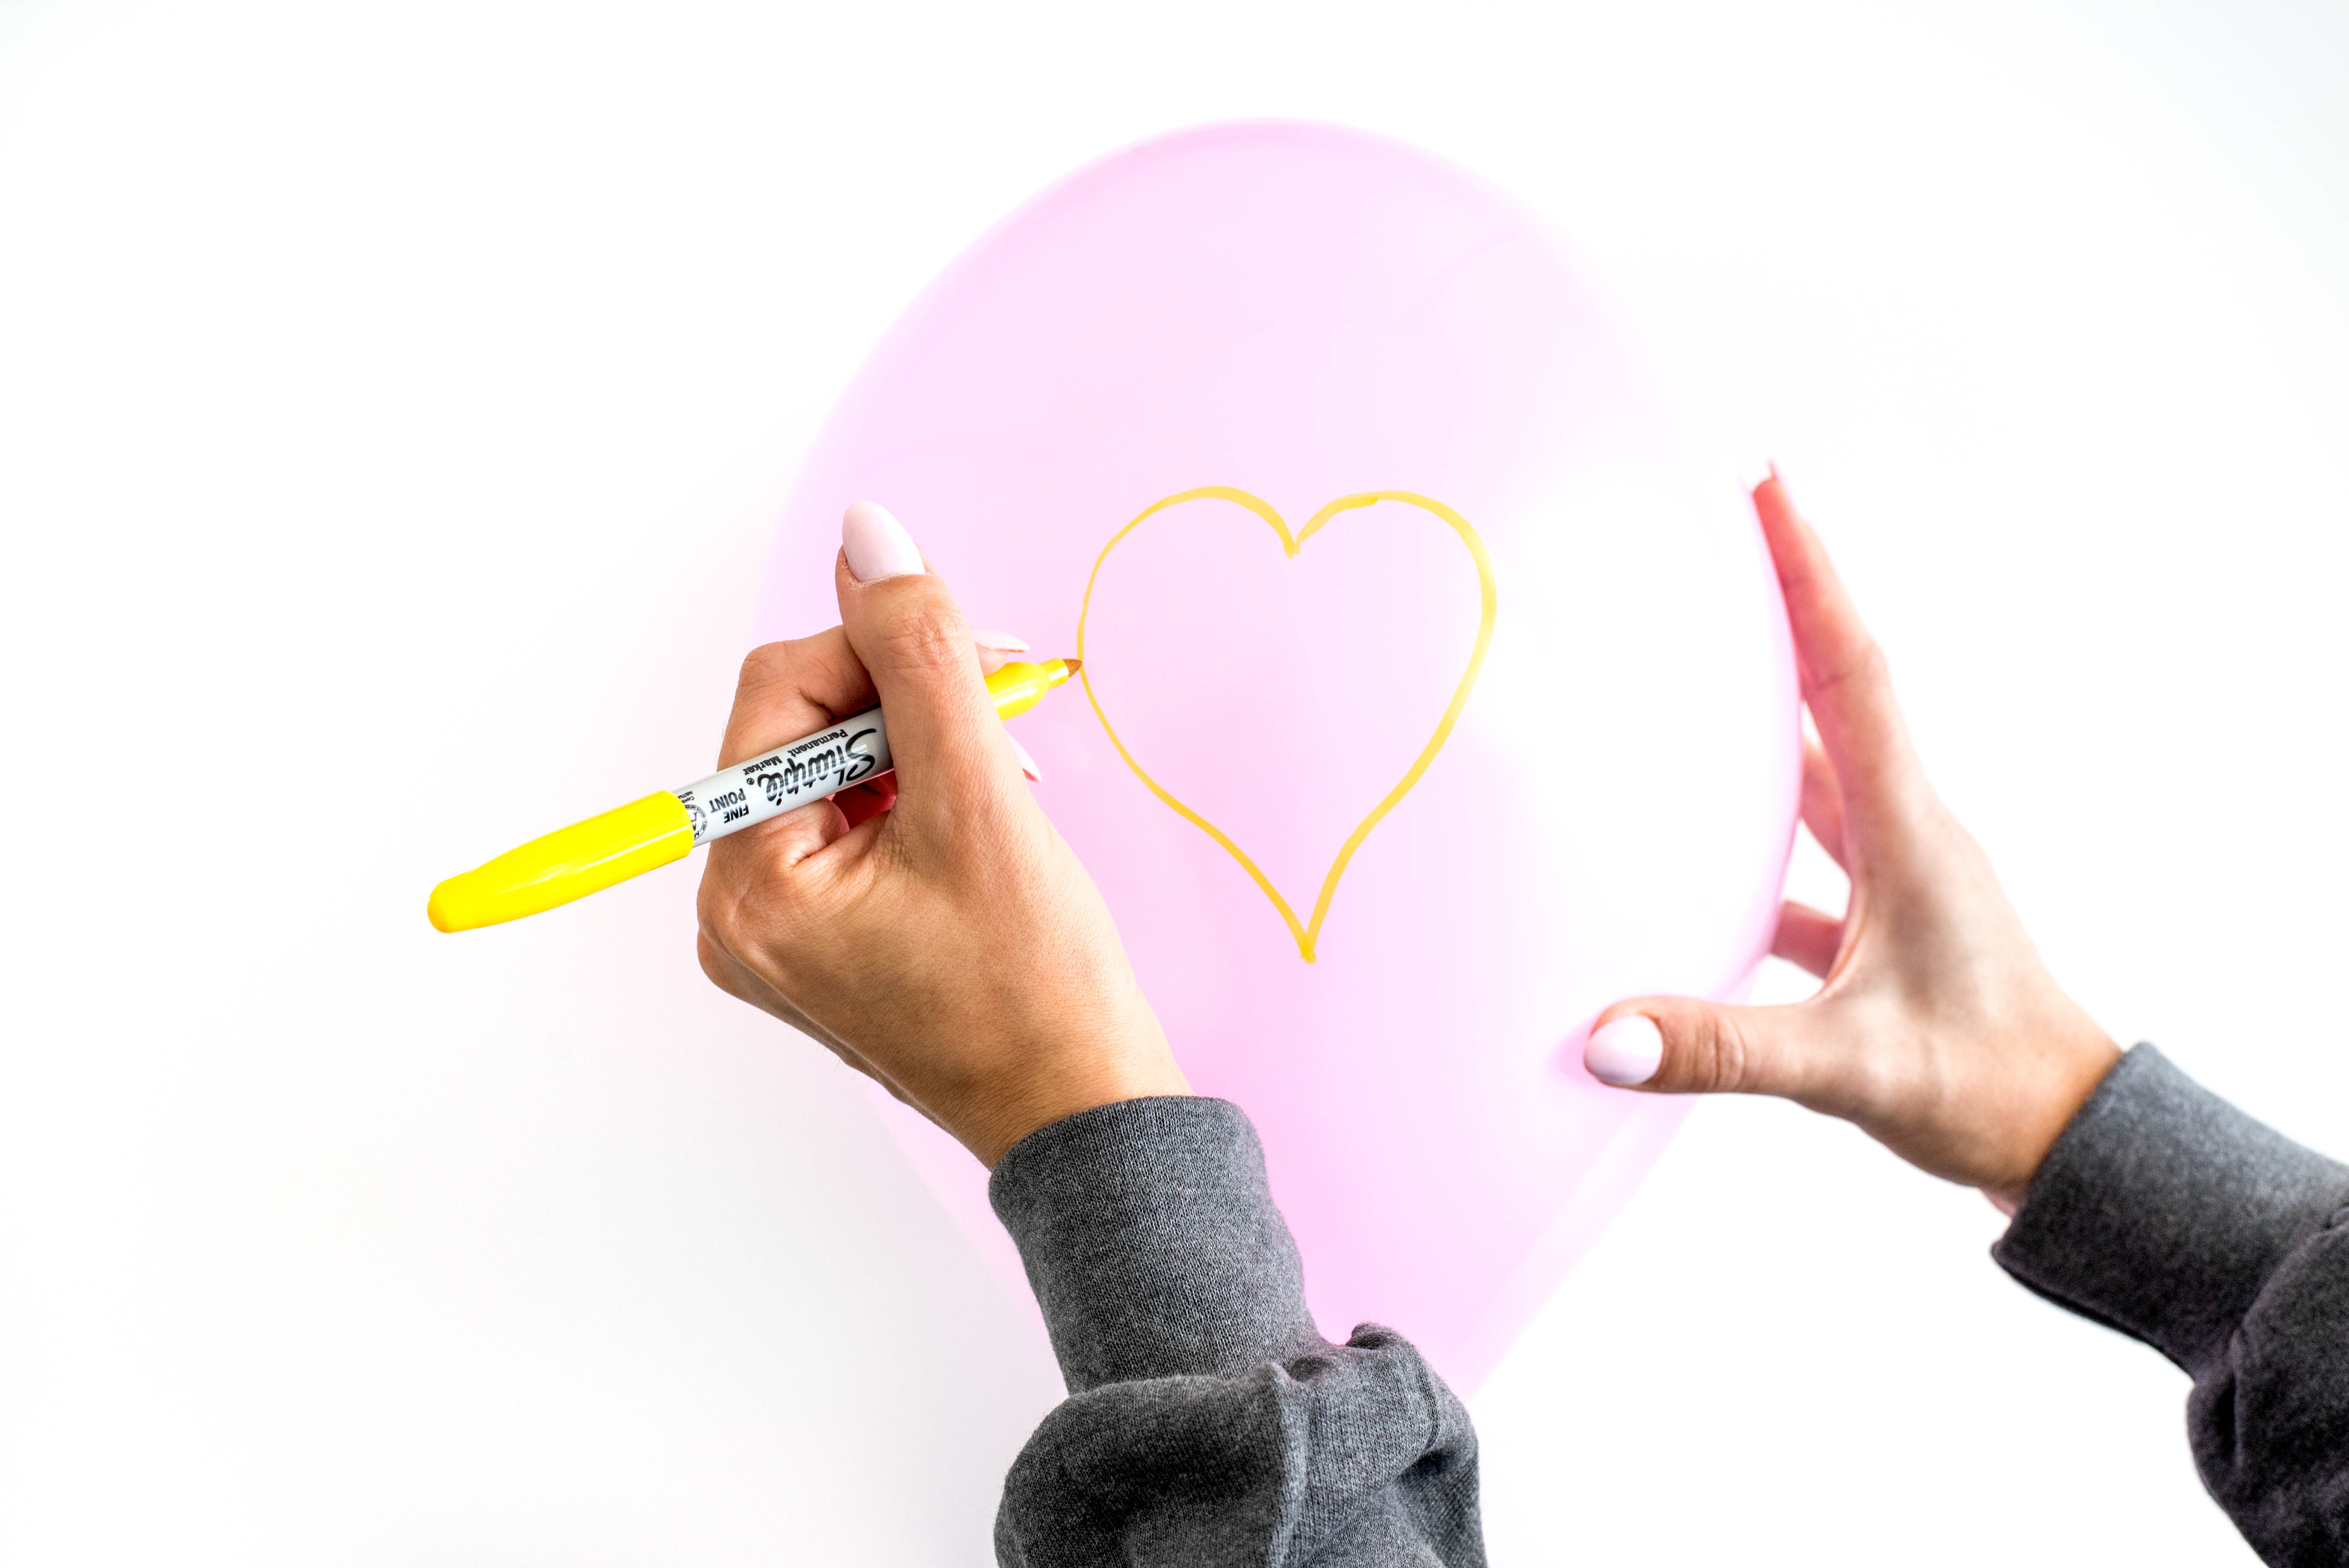 Using your sharpie, draw a design, letter or shape onto your balloon. Keep the designs relatively small. The larger the design, the more glitter that’s required, and the more it will weigh your balloon down!
Pick a sharpie color that is as close to the color of your glitter as possible. This way your outline won’t be as obvious from the opposite side of the balloon.
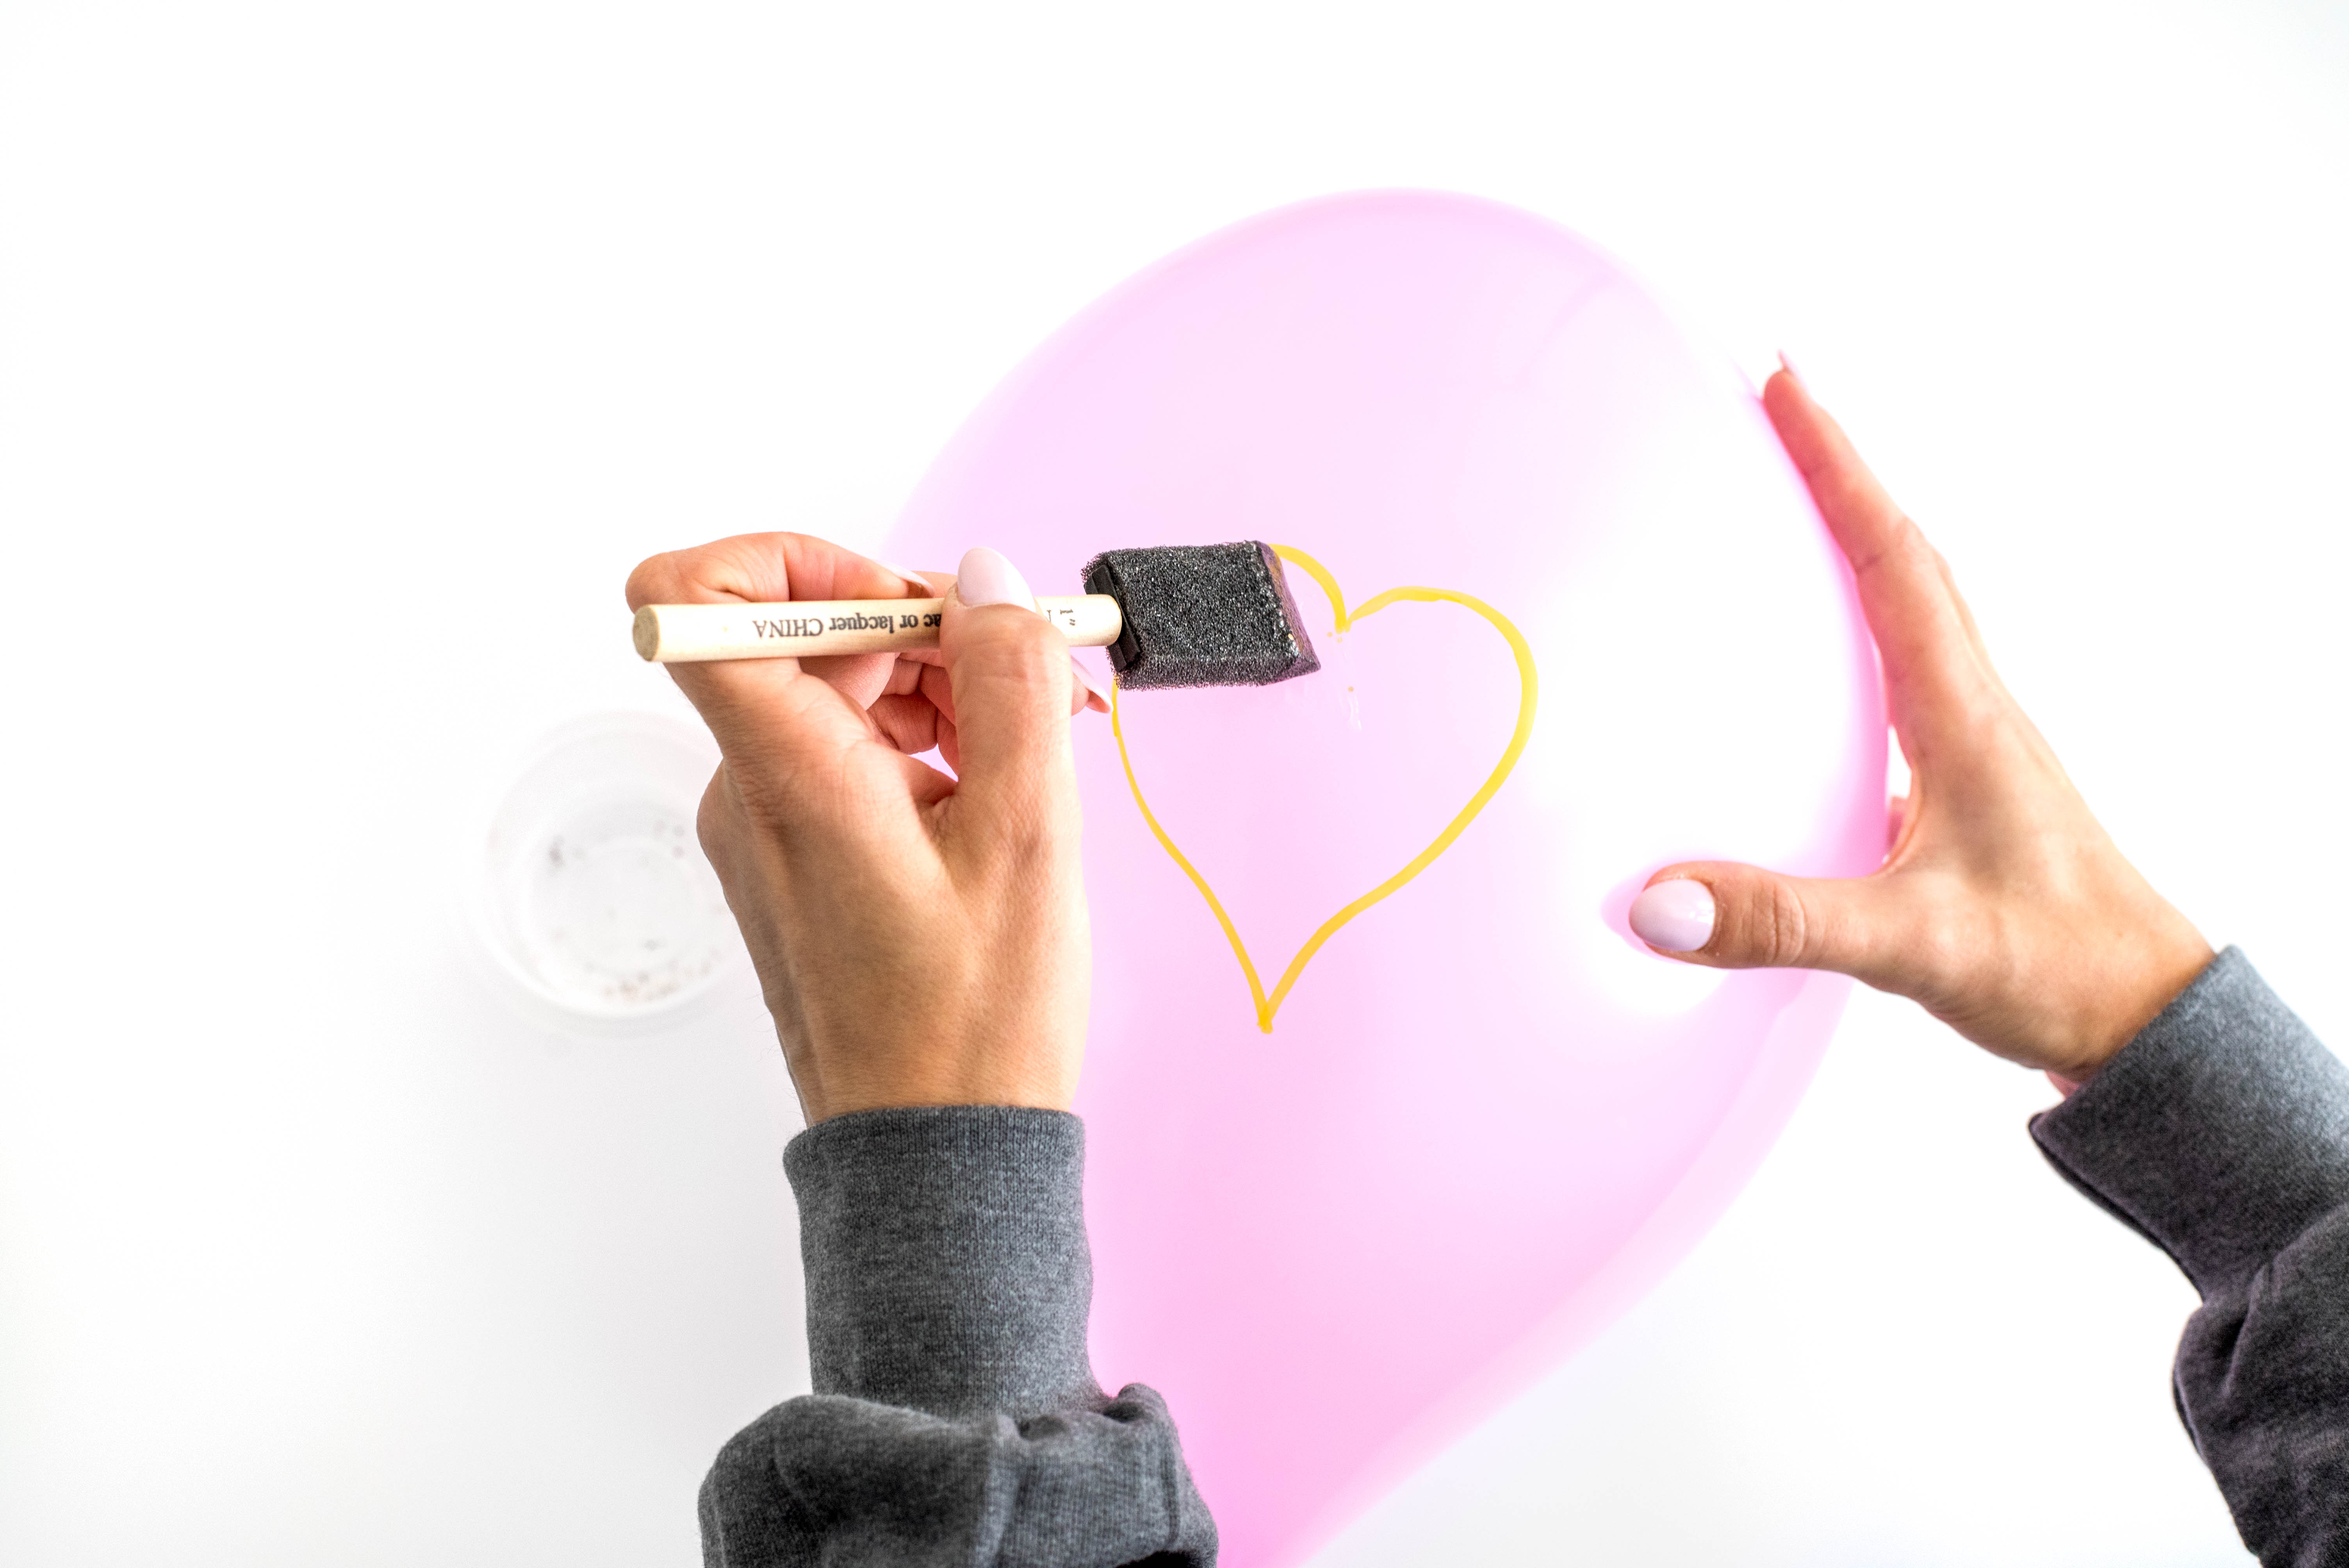
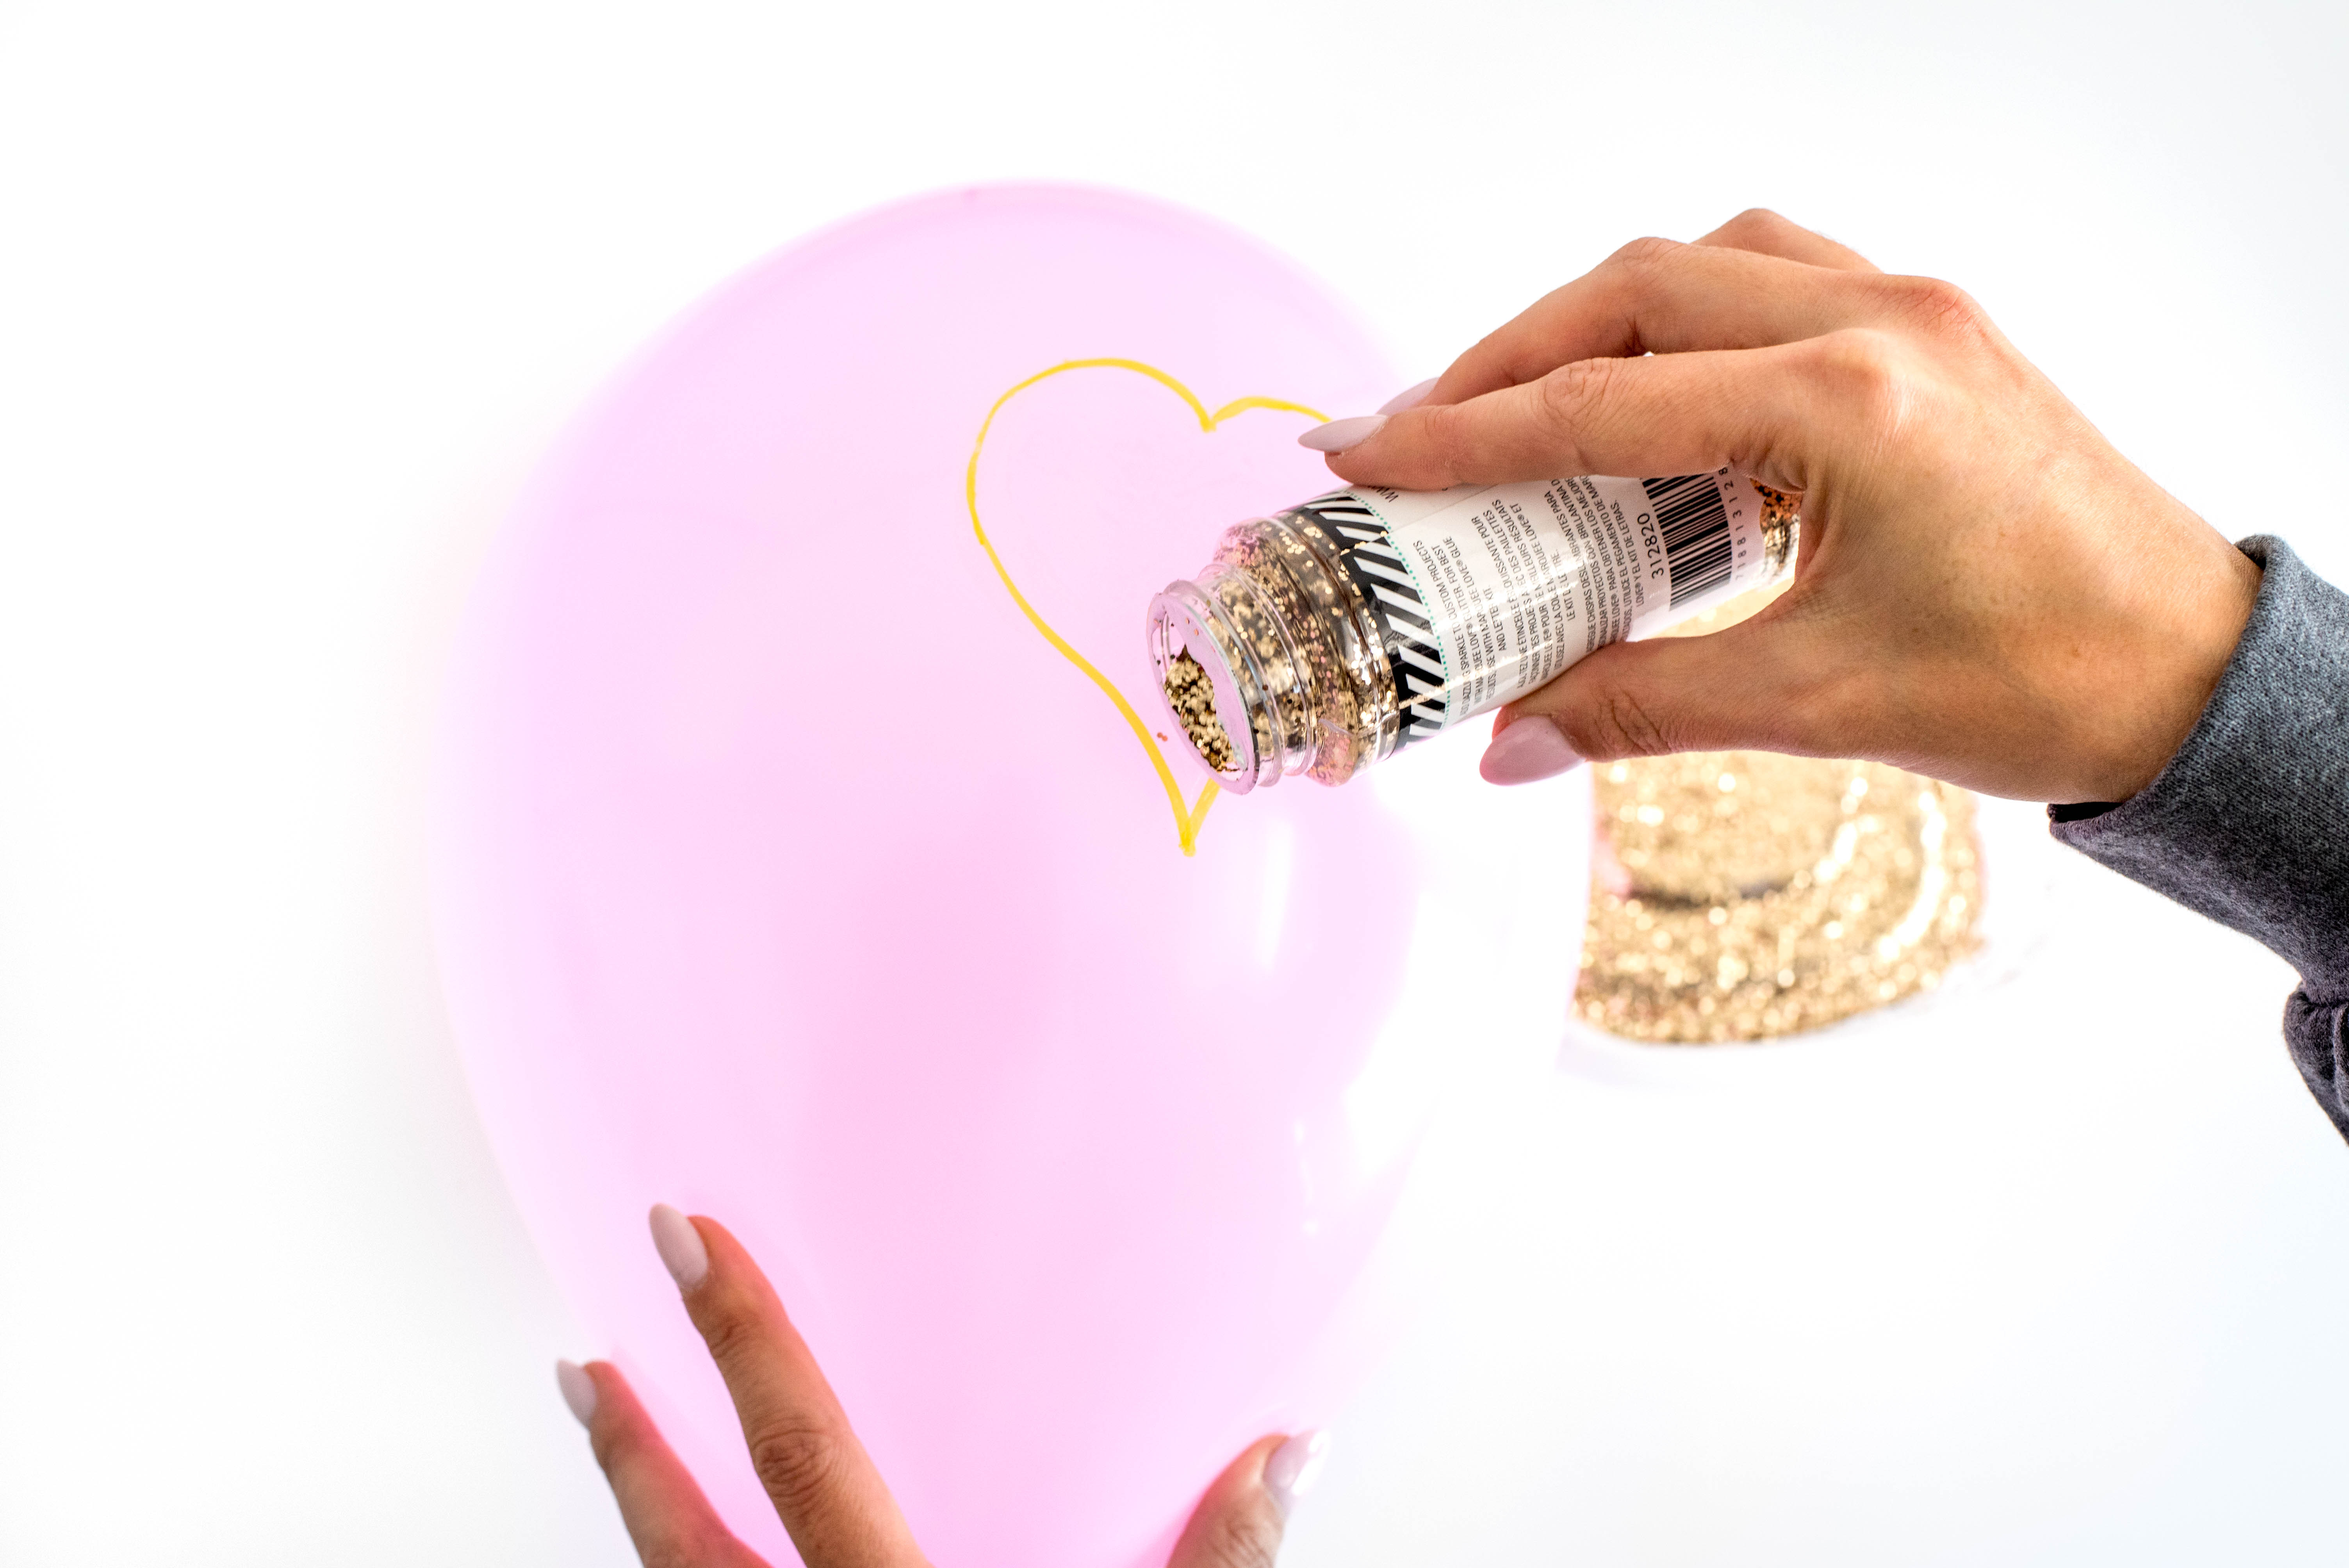
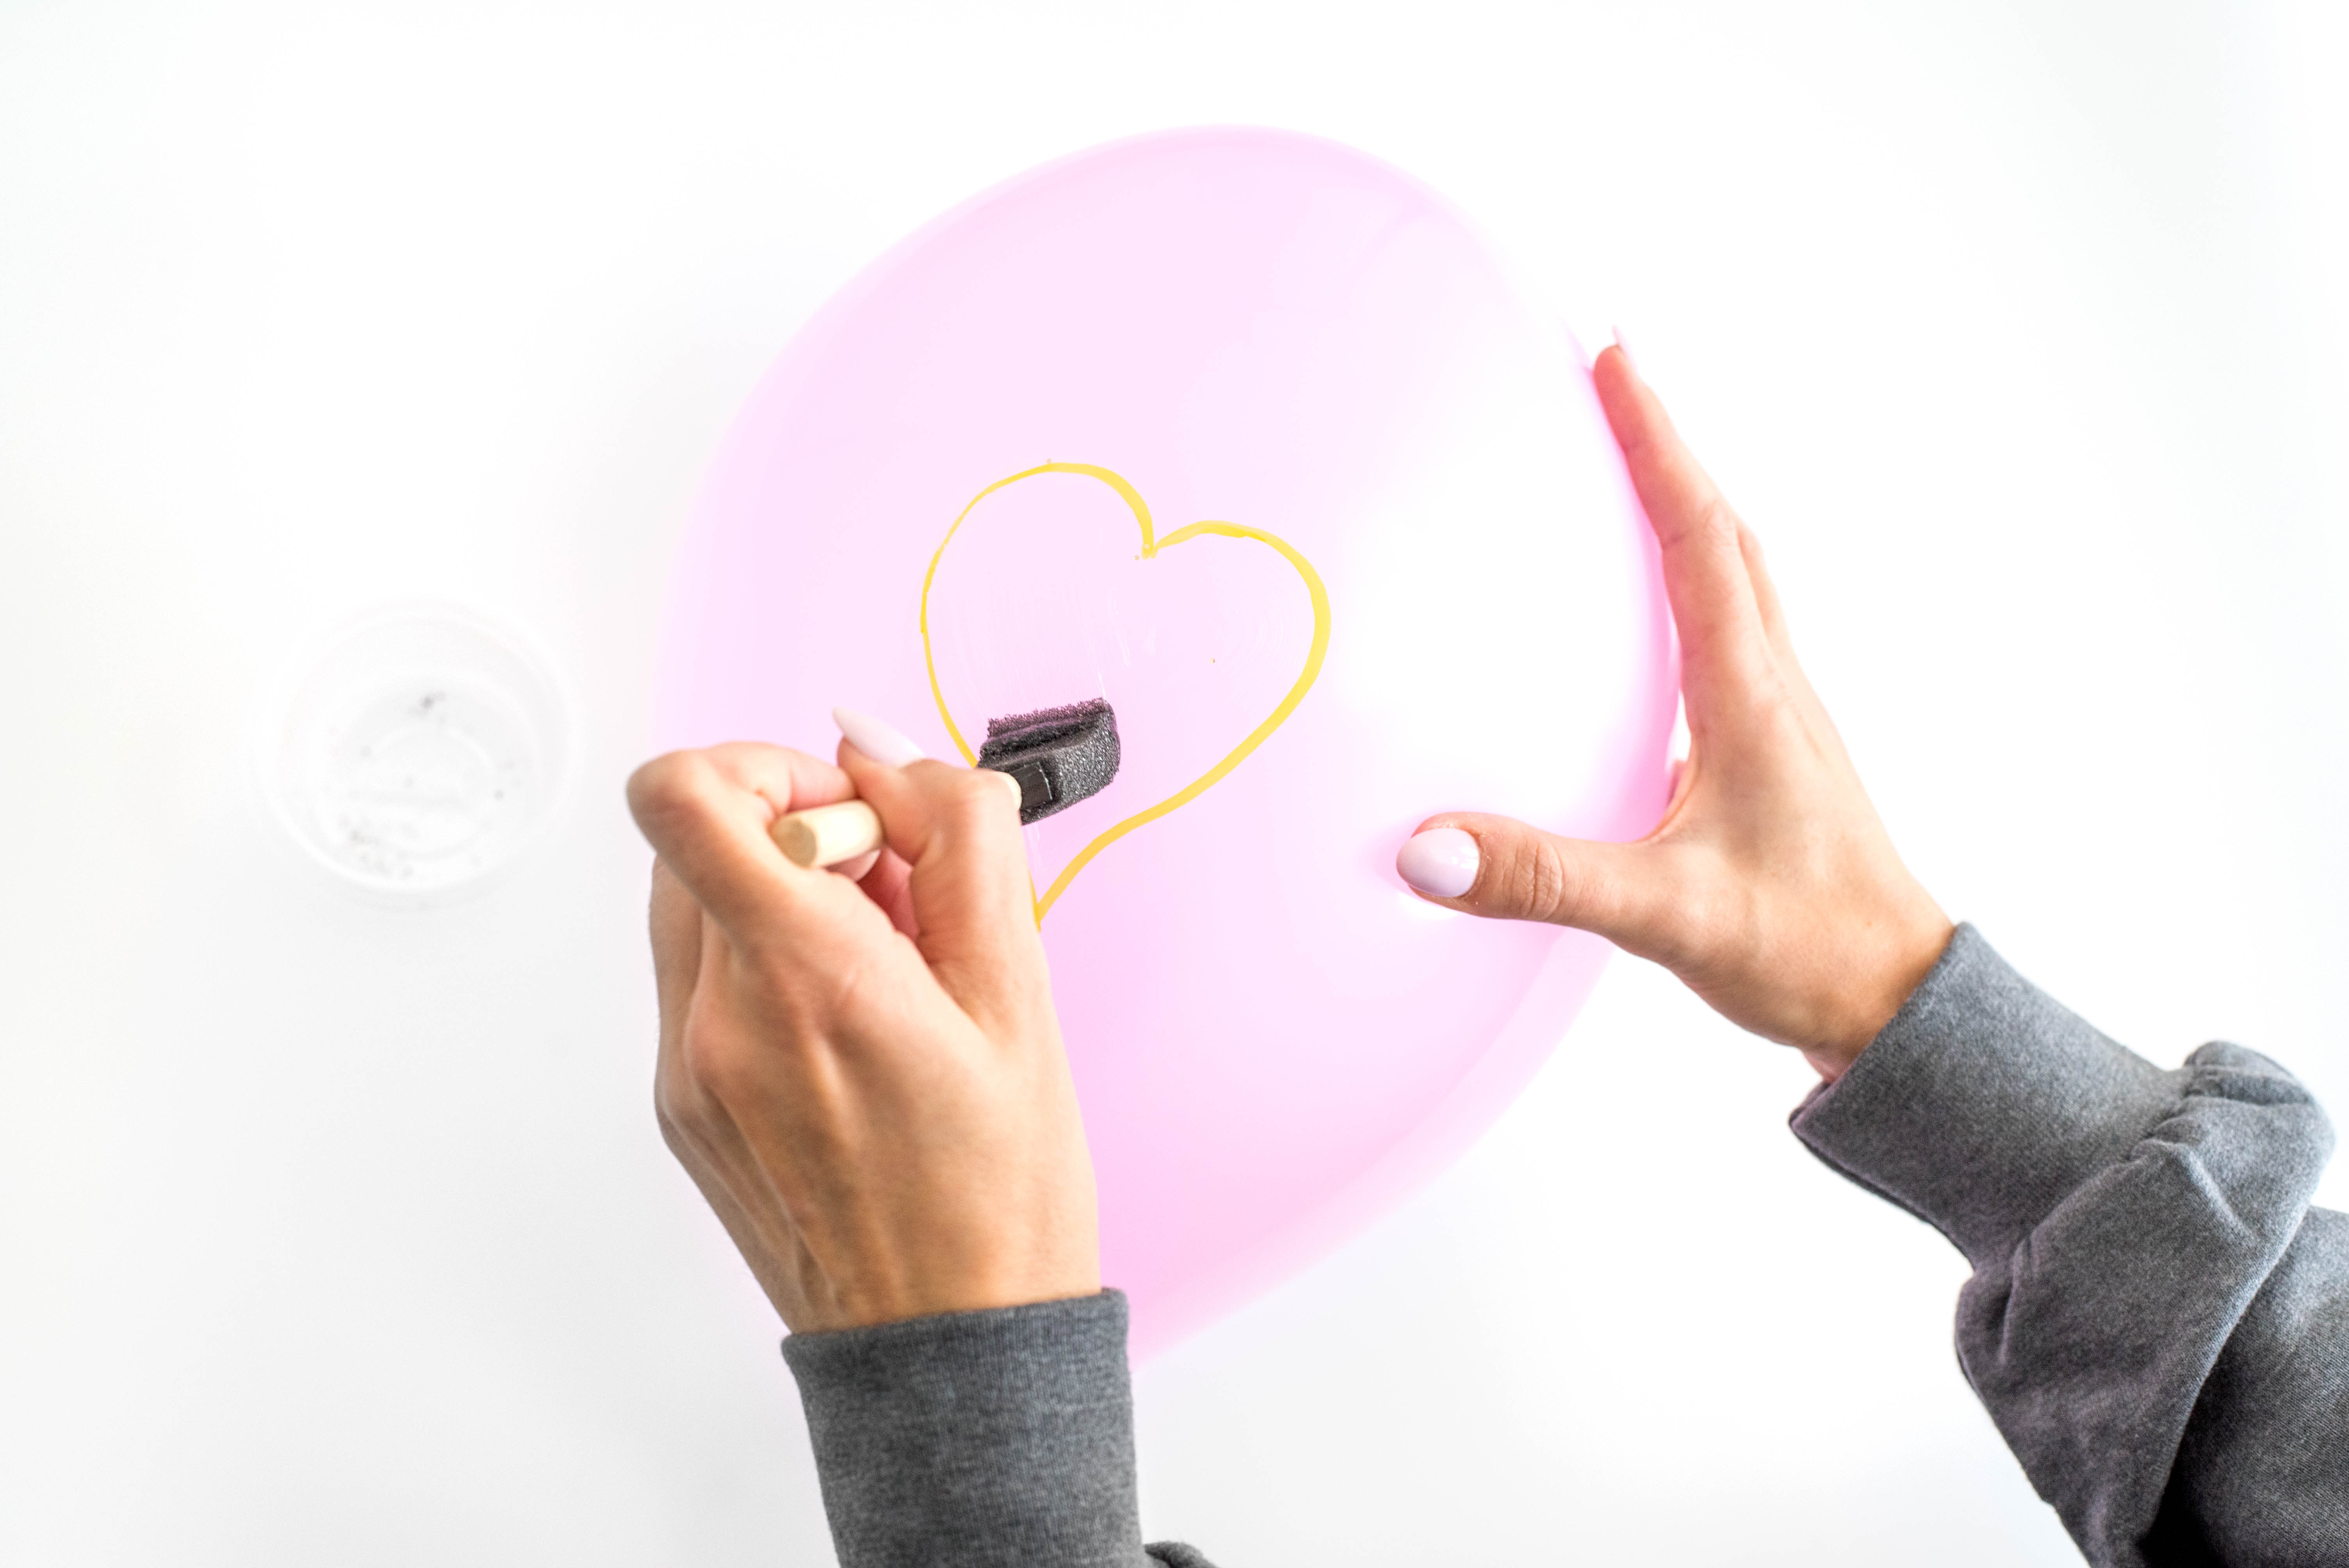 Using your sponge brush, fill in your design with the tacky glue. This time around, you do want to color outside of the lines a little bit with your glue so that the glitter will stick to the balloon and cover up your sharpie outline.
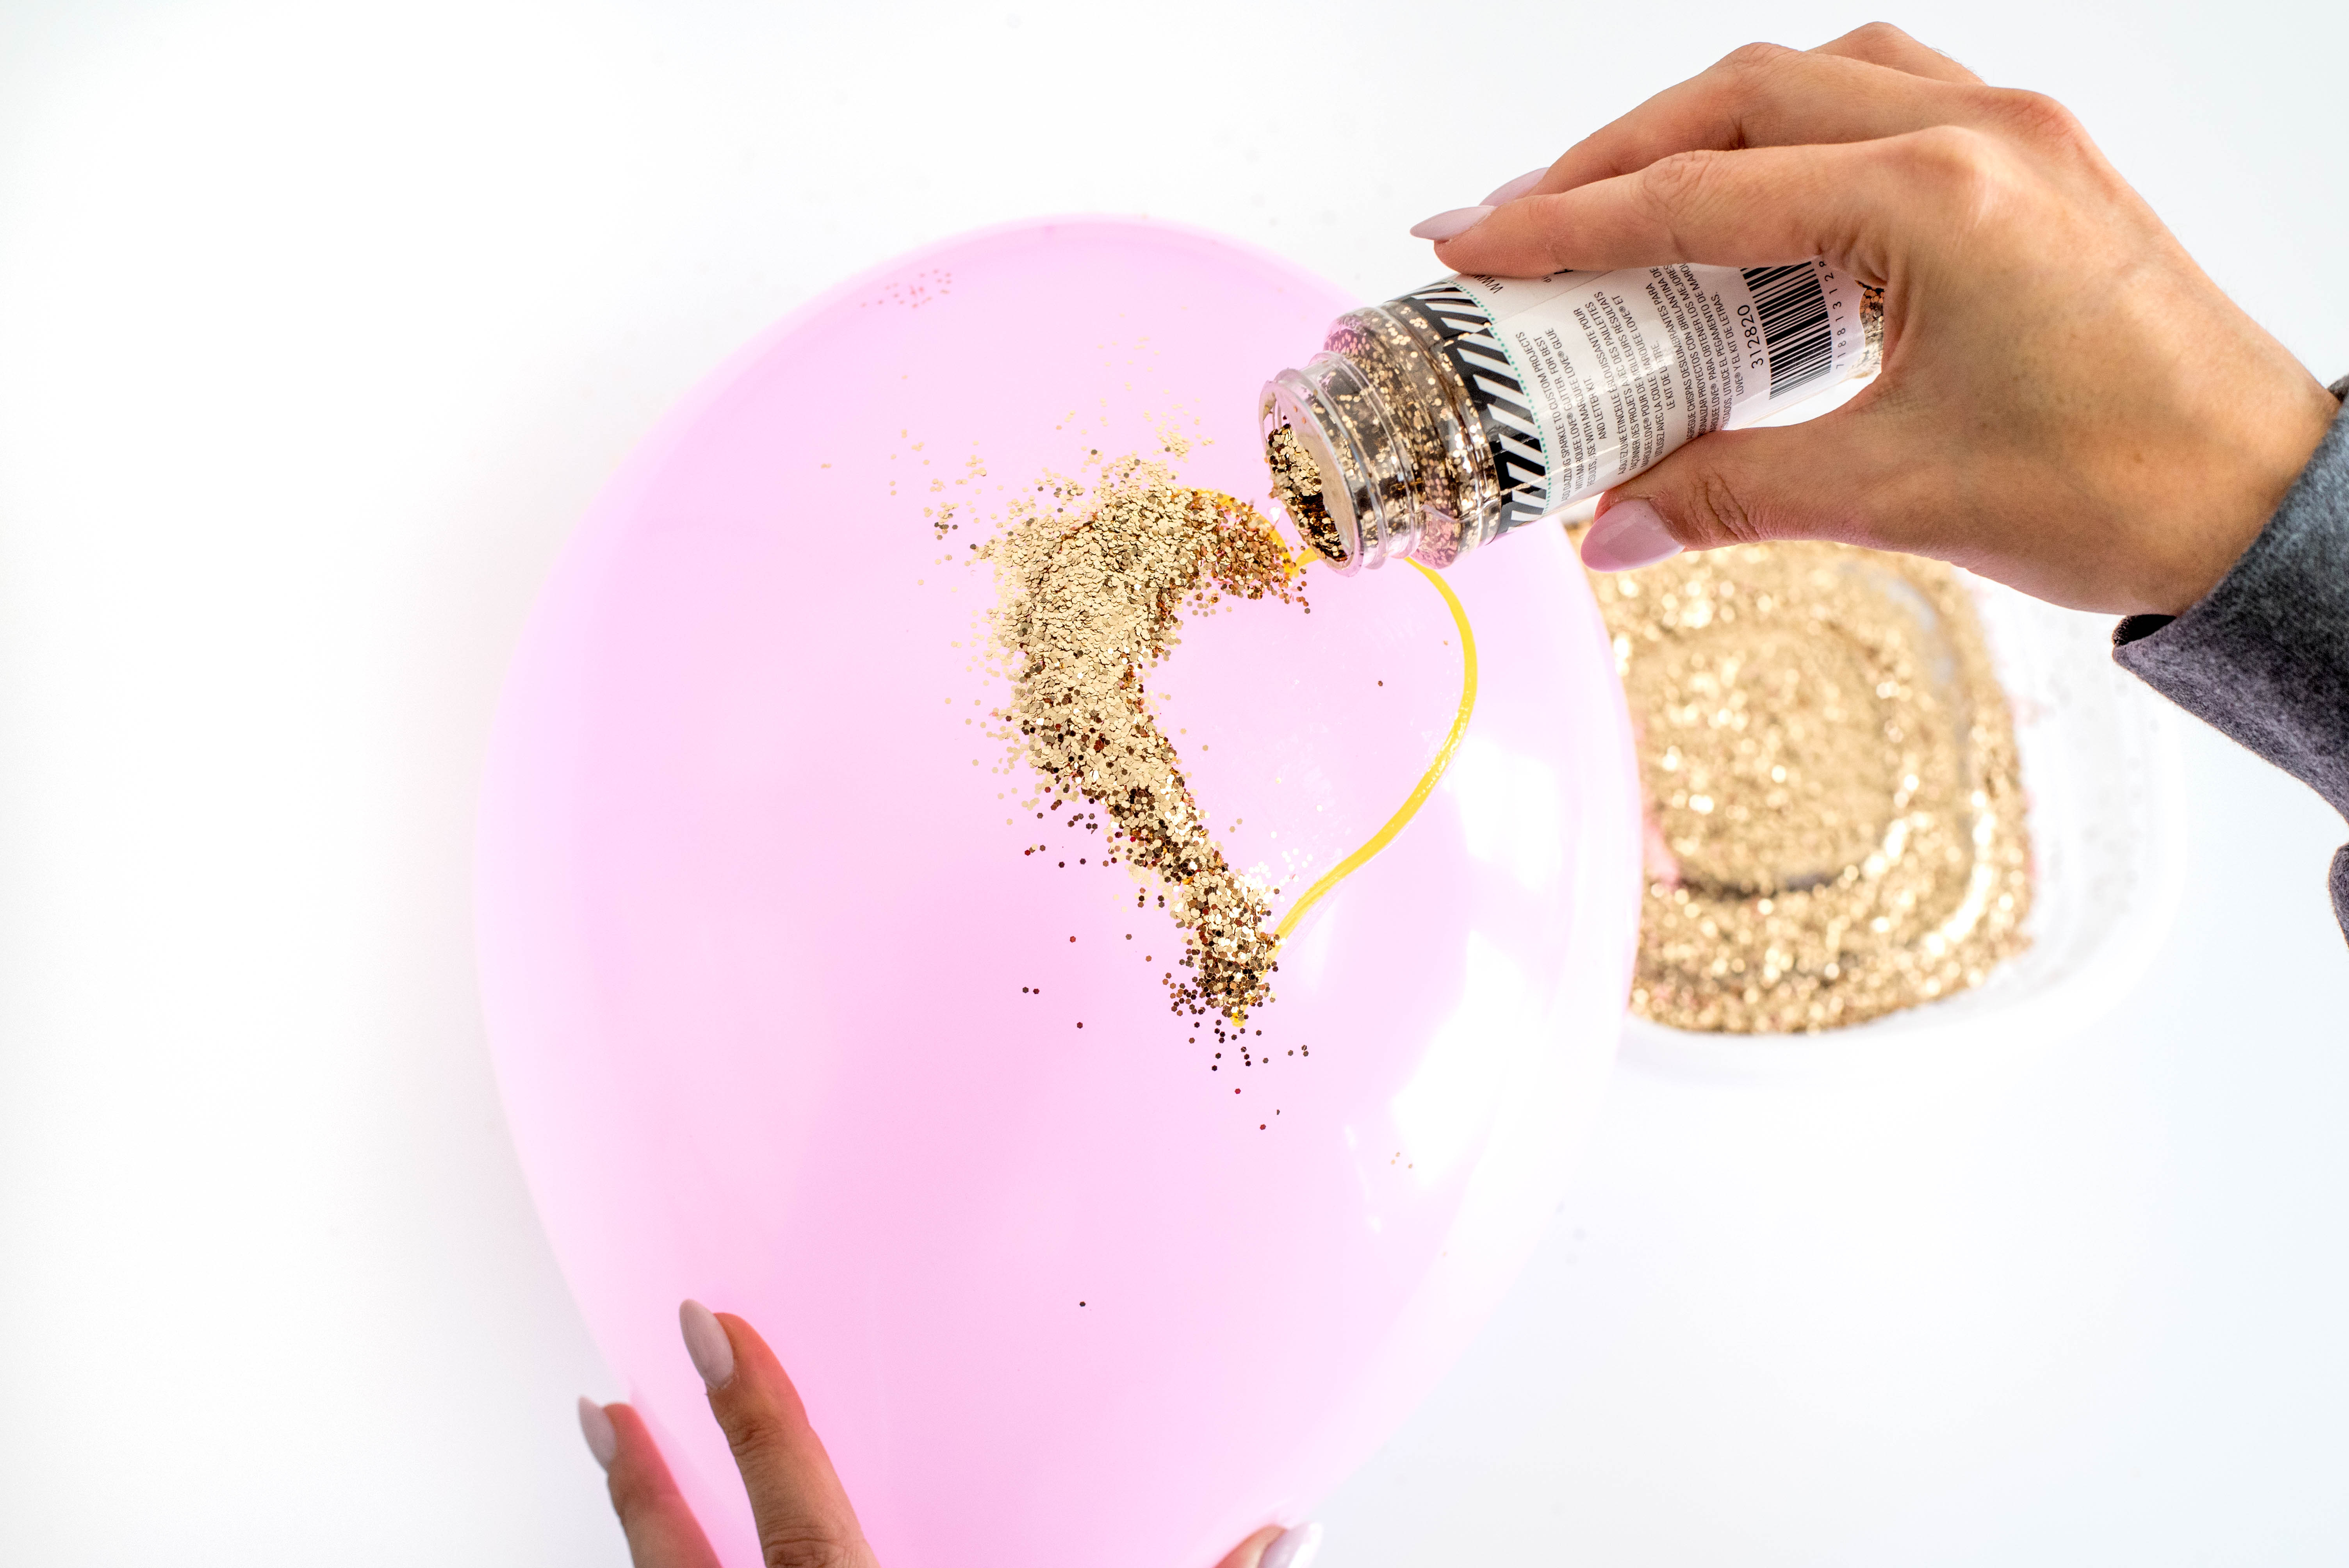
 Once your shape is completely covered with the tacky glue, begin pouring your glitter onto the glue, ensuring that you have it all covered. You can also pat it down to really get it to stick well.
(TIP: I tried to use a few different types of chunky glitter and they didn’t work as well. The bigger your glitter flakes, the more they will weigh your balloon down and prevent them from floating. Stick to basic glitter for the best results!)
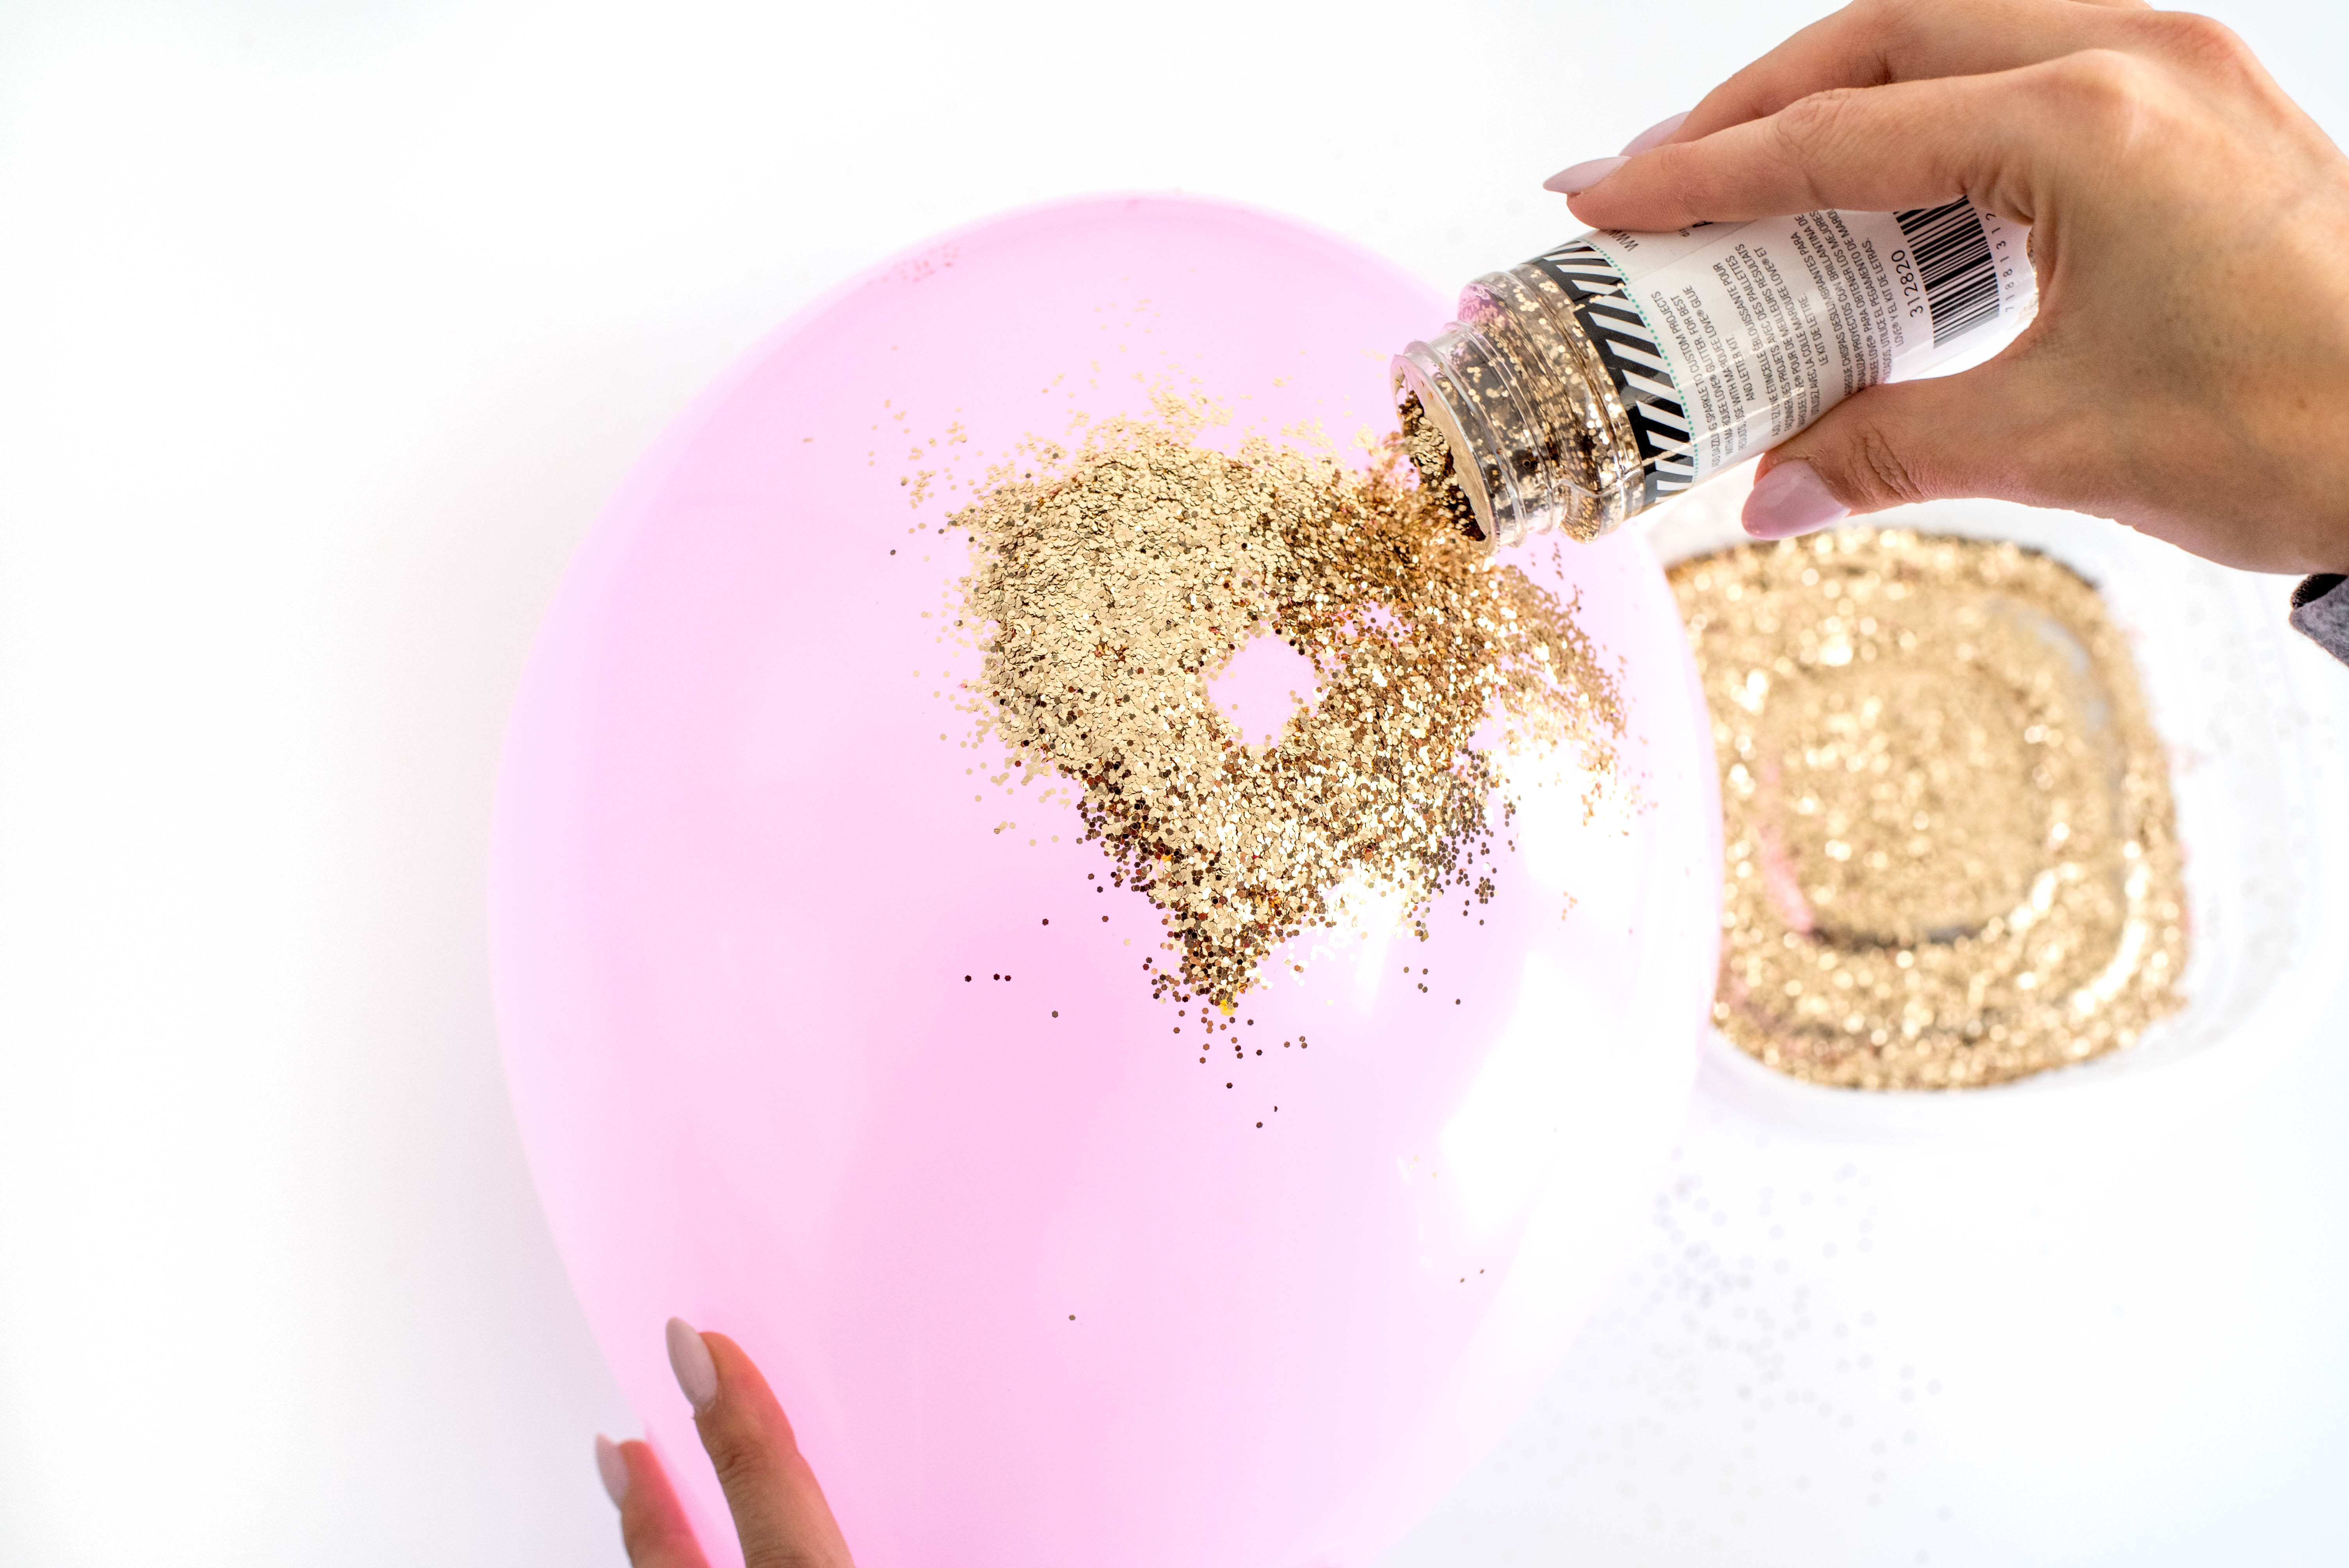
 Shake off the excess glitter and make sure the whole design it full. If not, go back over the empty spaces by repeating the same process.
 If you have any glitter that sticks to your balloons (in places that you don’t want) use a damp paper towel or cloth and carefully wipe the glitter off.
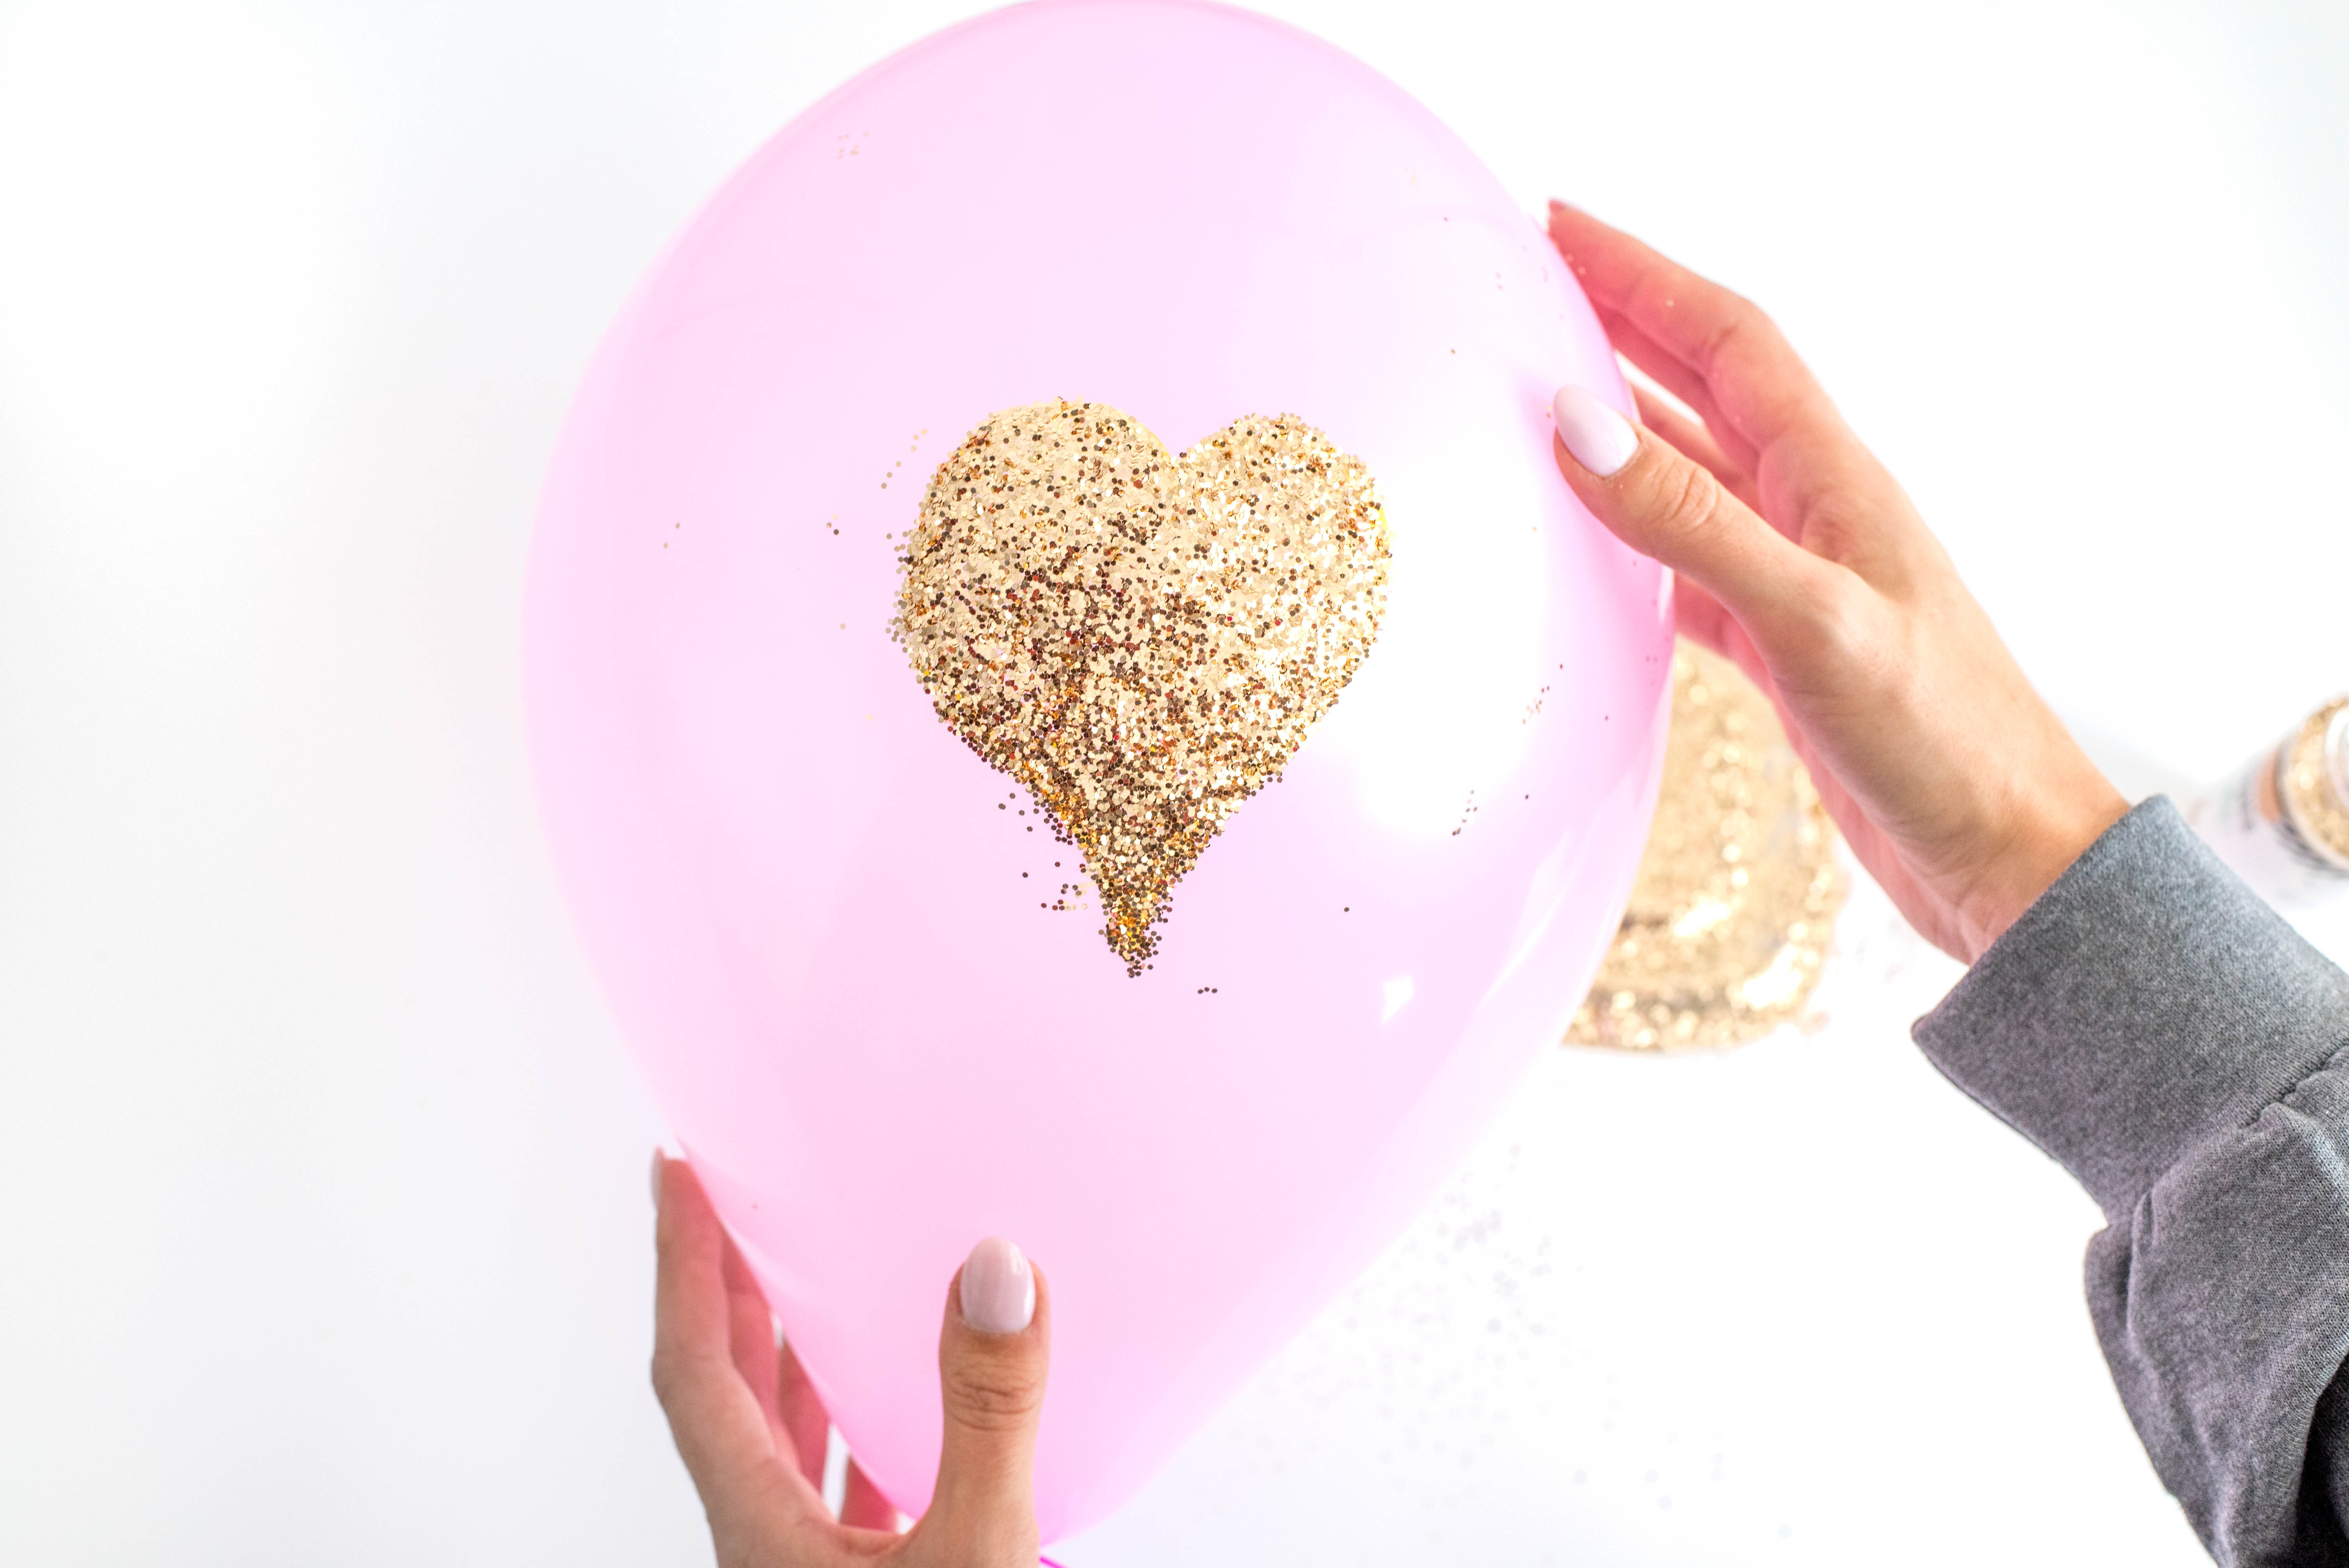
 These DIY glitter balloons have to made right before your event, so make sure you keep that in mind when planning your projects! They are quick and easy to make, but the glitter glue can start to peel off of the balloons after more than a few hours. A cute project, but definitely a temporary one.
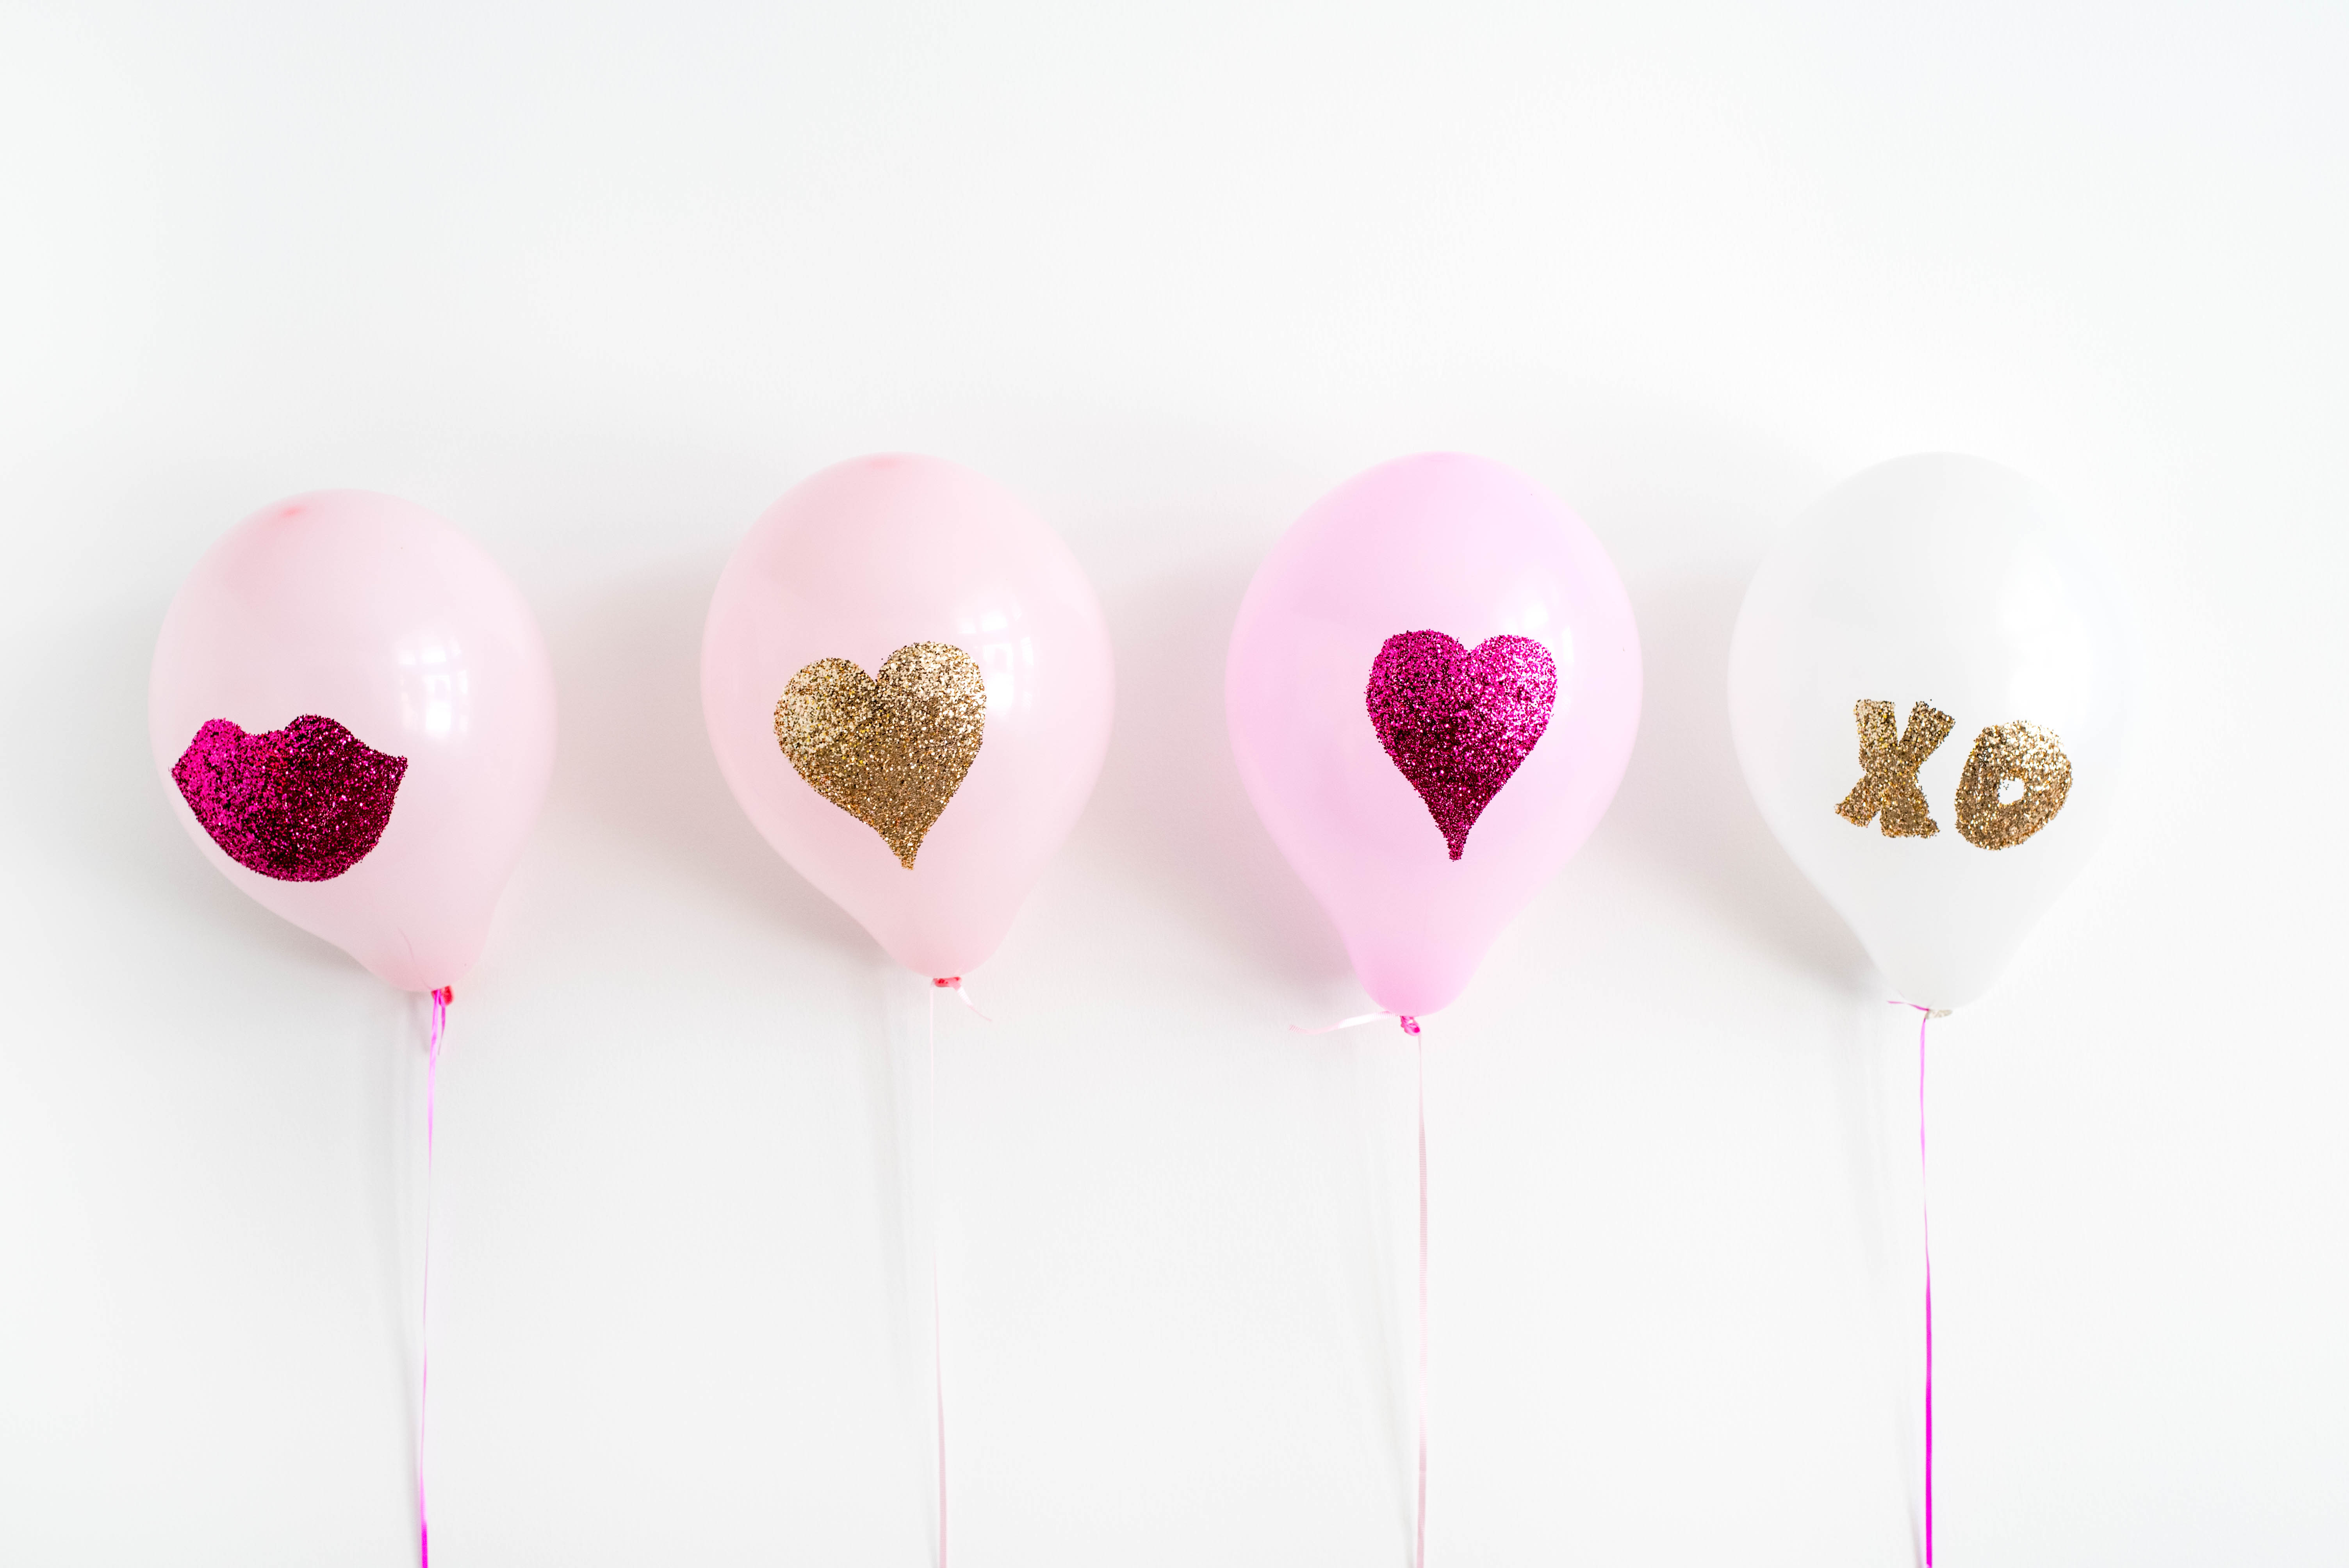 So, which one is your favorite? And what designs do you want to try?!
Super cute!!
Thanks Laurel!